• Skip to primary navigation
  • Skip to main content
  • Skip to primary sidebar
  • Skip to footer

Kitchen Academy

Unleash your culinary potential at Kitchen Academy. Learn essential skills, discover delicious vegetable recipes, and explore all things kitchen

  • Home
  • Recipes
  • Education
    • class 6
      • বিজ্ঞান class 6
    • Class 7
      • বিজ্ঞান class 7
    • Class 8
      • বিজ্ঞান class 8
    • class 9
      • বিজ্ঞান class 9

Recipes

Hawaiian chopped steak recipe

2024/2/7 by veg_admin Leave a Comment

zippy's macaroni salad recipe hawaii

Craving a taste of the Hawaiian islands? Look no further than Zippy’s Macaroni Salad Recipe, a culinary delight that captures the essence of Hawaii in every bite. In this blog post, we’ll delve into the secrets behind Zippy’s renowned macaroni salad, exploring the ingredients, preparation, and why it has become a staple in Hawaiian cuisine.

Unlocking the Secrets: Zippy’s Macaroni Salad Recipe Hawaii

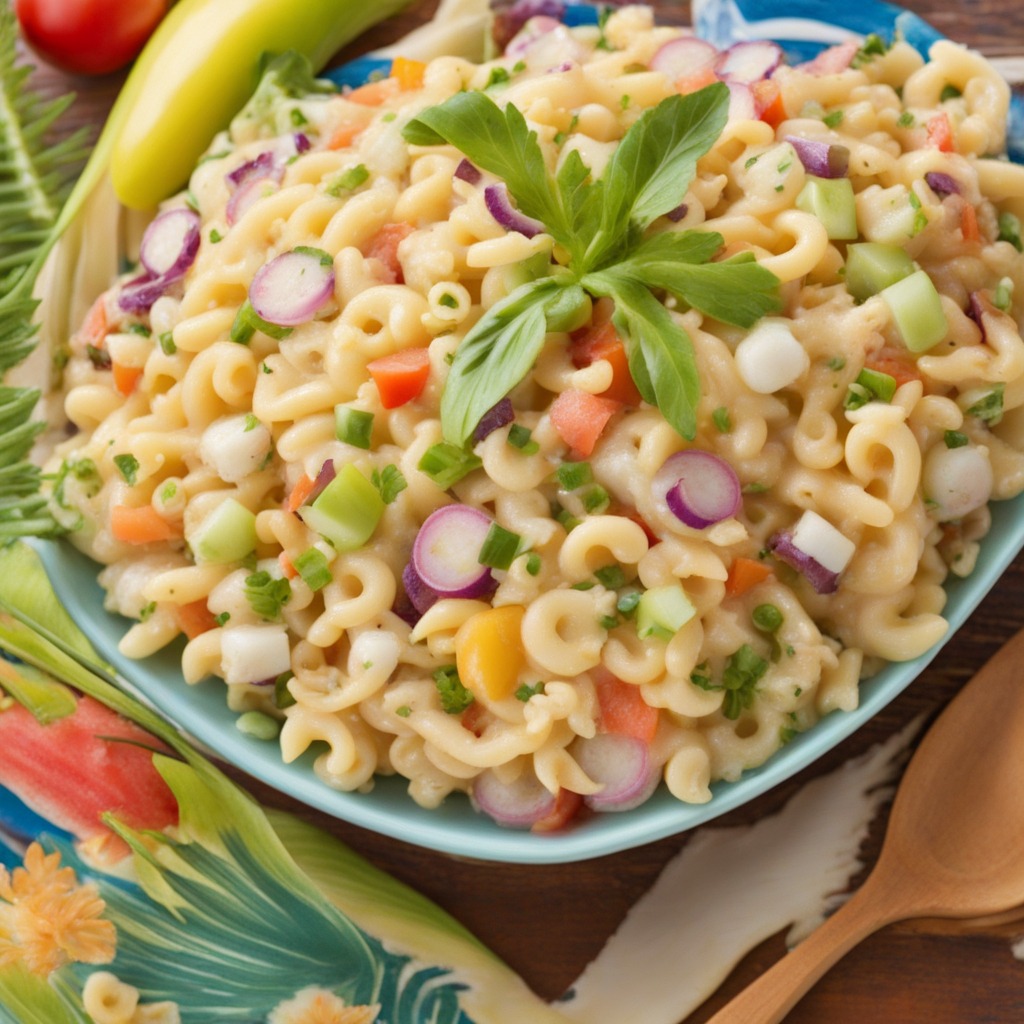
Zippy’s Macaroni Salad is a beloved dish that reflects the multicultural influences of Hawaii. To recreate this authentic experience in your kitchen, follow these steps closely.

Ingredients for Zippy’s Macaroni Salad:

  • Elbow macaroni
  • Mayonnaise
  • Milk
  • White sugar
  • White vinegar
  • Salt
  • Black pepper
  • Grated carrots
  • Finely chopped onions
  • Celery

Step-by-step instructions:

1.Cook the Macaroni: Boil the elbow macaroni until tender, then rinse and let it cool.

2. Prepare the Dressing: In a bowl, mix mayonnaise, milk, sugar, vinegar, salt, and pepper until smooth.

zippy's macaroni salad recipe hawaii

3.Combine Ingredients: Gently fold in grated carrots, chopped onions, and celery with the macaroni.

4.Chill and Serve: Refrigerate the salad for at least two hours before serving to enhance flavors.

Pros of Zippy’s Macaroni Salad Recipe:

  1. Simple Ingredients: The recipe uses readily available ingredients, making it easy for anyone to recreate the dish.
  2. Customizable: Feel free to adjust the ingredient quantities to suit your taste preferences.
  3. Make-Ahead Dish: Prepare it in advance for gatherings, allowing the flavors to meld over time.

Cons of Zippy’s Macaroni Salad Recipe:

  1. Caloric Content: The mayonnaise-based dressing contributes to the dish’s richness, which may not align with certain dietary preferences.
  2. Allergy Concerns: Individuals with egg or dairy allergies may need to find suitable substitutions for the mayonnaise and milk.

Food Value:

Zippy’s Macaroni Salad offers a delightful mix of carbohydrates, healthy fats, and vegetables. The carrots and celery provide essential vitamins, while the macaroni offers a good source of energy. Moderation is key, given the mayonnaise content

Conclusion

In conclusion, Zippy’s Macaroni Salad Recipe is more than just a dish – it’s a culinary journey that transports you to the heart of Hawaii with every forkful. This iconic recipe, born out of the cultural tapestry of the islands, has found a special place in the hearts and palates of locals and visitors alike. As you savor the delightful blend of flavors in each bite, you’re not just enjoying a meal; you’re experiencing a taste of the aloha spirit that defines Hawaiian cuisine.

Whether you’re recreating Zippy’s Macaroni Salad for a family gathering or simply seeking a delicious side to elevate your weeknight dinner, this recipe encapsulates the essence of Hawaii’s diverse culinary landscape. The simplicity of its ingredients, the versatility in pairing with other dishes, and the cultural significance make it a standout addition to any menu.

So, why not bring a touch of the Hawaiian islands to your table? With Zippy’s Macaroni Salad Recipe, you’re not just cooking; you’re creating a connection to the vibrant and unique food culture of Hawaii. Embrace the flavors, share the joy, and let each bite be a reminder of the warmth and hospitality that the spirit of aloha brings to the table. Mahalo for joining us on this flavorful adventure, and may your kitchen be filled with the delightful aroma of Zippy’s Macaroni Salad for years to come. Aloha!

FAQ

Most frequent questions and answers

Can I use gluten-free pasta for this recipe?

Yes, you may replace the elbow macaroni with gluten-free pasta. Make sure to cook the pasta for the recommended amount of time, and take into account any texture differences.

Is there a dairy-free alternative for the dressing?

Of course! For a dairy-free version of Zippy’s Macaroni Salad, use non-dairy substitutes such plant-based milk and vegan mayonnaise.

Can I make Zippy's Macaroni Salad ahead of time?

Indeed. Actually, the tastes of the salad are enhanced when it is chilled in the fridge for at least two hours. When getting ready for an occasion, you may also save time by doing things a day ahead of time.

Are there variations to the recipe?

Think beyond the box; Zippy’s Macaroni Salad is a classic, but don’t limit yourself. For a different twist, try adding chopped ham, bits of pineapple, or shredded coconut.

How long does the salad stay fresh in the refrigerator?

For up to two or three days, Zippy’s Macaroni Salad can be kept in the refrigerator in an airtight container. Still, it’s better to eat it within the first day or two for optimal flavor and texture.

Can I adjust the sweetness and tanginess of the dressing?

Of course! You can change the amounts of vinegar and sugar to suit your own tastes. To find the ideal balance for your taste, start with the suggested amounts and make adjustments.

Can I make this recipe for a large gathering?

Of course! Just change the component amounts according to how many servings you require. Popular among the masses, Zippy’s Macaroni Salad is ideal for potlucks and family get-togethers.

Are there any side dishes that pair well with Zippy's Macaroni Salad?

Zippy’s Macaroni Salad goes well with a lot of foods, including seafood and grilled meats. It can also be served as an accompaniment to a typical Hawaiian plate lunch. This is a really adaptable side that goes nicely with a lot of main dishes.

Can I add extra vegetables to the salad?

Of course! You can customize the macaroni salad at Zippy’s. To add color and texture, feel free to add more veggies, such as sliced cucumber, bell peppers, or peas.

Is Zippy's Macaroni Salad a traditional Hawaiian dish?

Although the Zippy’s recipe may not be very old, macaroni salad is a common side dish in Hawaii, frequently presented with regional specialties. Over the years, Zippy’s rendition has grown to be regarded as a classic.

Explore a world of culinary delights on vegetable-recipes.net! Whether you’re seeking savory sides, hearty mains, or innovative vegetable-based dishes, our homepage is your gateway to a treasure trove of flavorful recipes. Visit to discover the latest additions and elevate your vegetable-centric culinary journey!

Filed Under: Recipes

1950s Tamale Pie: A Taste of Vintage Comfort Food

2024/2/7 by veg_admin Leave a Comment

1950s recipe for tamale pie

Is your kitchen lacking a touch of comfort and nostalgia? You’ve found it! This blog post will take you on a lovely culinary journey through a 1950s tamale pie recipe, taking you back in time. In addition to providing a detailed recipe for making this traditional dish, we will also discuss the cultural significance and history of tamale pie during this legendary period.

Tamale Pie’s History in the 1950s

Let’s We must first comprehend the historical background of this 1950s tamale pie recipe in order to fully appreciate its appeal. Due to shifting social and cultural forces, American kitchens saw significant change throughout this post-war decade. Tamale pie, which combines American and Mexican ingredients to produce a distinctive and fulfilling dish, became a beloved comfort food.

Ingredients for Tamale Pie from the 1950s:

First, let’s review the essential components you’ll need to start your nostalgic cooking journey. In order to create the ideal 1950s tamale pie, assemble the following:  

  • One pound of ground beef
  • One finely sliced onion
  • One green bell pepper, cut finely
  • One can of drained canned corn
  • Can of tomato sauce one
  • sliced canned olives (half a cup)
  • Spice (1 tsp)
  • tsp of chili powder
  • 1/2 teaspoon salt
  • Grains (1 cup)
  • 1 tsp. baking powder
  • One cup of milk
  • Pair of battered eggs
  • Shredded cheddar cheese, one cup
  • After assembling your supplies, let’s proceed to the detailed instructions for making this delicious 1950s tamale pie.

Method by Step of the 1950s Tamale Pie Recipe:

1.Assemble the meat filling:
Brown the ground beef over medium heat in a pan. Add the chopped green bell peppers and onions. Cook until they become soft. Add the tomato sauce, chopped olives, cumin, chili powder, and salt after adding the canned corn. Simmer for ten or so minutes.

2. Cornmeal Bottom:

Cornmeal, baking powder, milk, and beaten eggs should all be combined into a smooth batter in a different basin.

1950s recipe for tamale pie

3. Put the Tamale Pie Together:

Use half of the cornmeal batter to create the bottom crust in a baking dish that has been buttered.

4. Incorporate the Meat Filling:

Over the cornmeal crust, pour the meat filling.

5. Add cheese on top:

Evenly distribute the shredded cheddar cheese over the filling made of meat.

6. Finish Off the Pie:

After preheating the oven to 375°F (190°C), bake the tamale pie for thirty to thirty-five minutes, or until the filling is bubbling and the crust is golden brown.

7.Bake until done:

After preheating the oven to 375°F (190°C), bake the tamale pie for thirty to thirty-five minutes, or until the filling is bubbling and the crust is golden brown.

The Reminiscent Taste:

You’ll start to enjoy the harmonious fusion of tastes in your 1950s tamale pie as it bakes to perfection—the cozy cornmeal crust, the ooey-gooey cheese on top, and the robust beef inside. This recipe offers warmth, simplicity, and that distinct cozy feeling that perfectly captures the essence of the 1950s.

How to Serve Tamale Pie:

After a few minutes of cooling, cut and serve your freshly prepared tamale pie. It tastes great served with fresh salsa and avocado on the side or with a dab of sour cream. This hearty dish brings back fond memories of carefree days and is ideal for family dinners or get-togethers.

Plate of Nostalgia: Tamale Pie from the 1950s in Contemporary Times

The allure of the tamale pie endures despite the passing of the 1950s. For those who sample it, the combination of flavors and textures continues to entice their palates. In addition, this dish is a wonderful way to preserve the spirit of a bygone age while teaching the next generation about a bit of culinary history.

overview:

To sum up, the tamale pie recipe from the 1950s is a gastronomic treasure that you should try making in your contemporary kitchen. Its deliciousness, simplicity, and history make it a tempting option for anybody looking for a little nostalgia. Enjoy this tamale pie for dinner on the weeknight or serve it during a special family get-together; it will take you back to a more carefree, loving era.

Also can try Pollo tropical chicken recipe. 

Filed Under: Recipes Tagged With: 1950s Tamale Pie

How to Make the Best Potato Latkes Ever: A Complete Guide

2024/2/7 by veg_admin 2 Comments

potato lake recipes

Join us on a journey to explore the history, ingredients, variations, cooking methods, nutrition, and tips of making potato latkes – the world of crispy, golden, and delicious fried potato pancakes. These savory pancakes tantalize your taste buds and are made from grated potatoes, eggs, flour, and seasonings. While traditionally served during Hanukkah, the Jewish festival of lights, you can enjoy them anytime as a snack, appetizer, or side dish. So hold on tight and let’s dive into the world of potato latkes!

What are potato latkes?

potato latkes recipe

Fried potato pancakes, known as potato latkes, are a popular Jewish dish. The Jewish festival of lights, Hanukkah, traditionally includes the consumption of this dish. According to tradition, the potato latkes symbolize the miracle of the oil that lasted for eight days in the ancient Temple of Jerusalem. However, people enjoy potato latkes throughout the year as a tasty snack or side dish.


What is the origin of potato latkes?

The recipe for potato latkes emerged in Eastern Europe in the 18th century when potatoes became widely available and affordable. Potatoes were a staple food for the poor Jewish communities, who adapted the latke recipe to use them. The oil used to fry the latkes represents the oil that lit the menorah, the candelabrum that is the main symbol of Hanukkah.

What are the ingredients for potato latkes?

The basic ingredients for potato latkes are potatoes, eggs, flour, salt, and pepper. You can use any type of potato, but the best ones for latkes are starchy or all-purpose potatoes, such as Russet, Yukon Gold, or Idaho. You will need about 2 pounds of potatoes or 4 to 5 medium-sized ones for a batch of 12 to 15 latkes.


Egg:

Eggs act as a binder and add moisture and richness to the latkes. You will need 2 large eggs, lightly beaten, for a batch of 12 to 15 latkes.


Flour:

The flour helps absorb the excess moisture from the potatoes and eggs and prevents the latkes from falling apart. You can use all-purpose flour, matzo meal, or breadcrumbs, depending on your preference and dietary restrictions. You will need about 1/4 cup of flour for a batch of 12 to 15 latkes.


Salt:

Salt and pepper add flavor and seasoning to the latkes. You can adjust the amount according to your taste, but a good starting point is 1 teaspoon of salt and 1/4 teaspoon of black pepper for a batch of 12 to 15 latkes.


Oil:

Oil is essential for frying the latkes and creating a crispy and golden crust. You can use any neutral oil with a high smoke point, such as vegetable, canola, or sunflower oil. You will need about 1/4 cup of oil for a batch of 12 to 15 latkes.


Also, you can add some optional ingredients to enhance the flavor and texture, such as onion, garlic, parsley, and baking powder. Onion adds a sweet and savory flavor and aroma to the latkes. You will need about 1 medium onion, finely chopped or grated, for a batch of 12 to 15 latkes. Garlic adds a pungent and spicy flavor and aroma to the latkes. You will need about 2 to 3 garlic cloves or 1/2 teaspoon of garlic powder for a batch of 12 to 15 latkes. Parsley adds a fresh and herbal flavor and color to the latkes. You will need about 2 tablespoons of fresh parsley, finely chopped, or 2 teaspoons of dried parsley for a batch of 12 to 15 latkes. Baking powder helps the latkes rise and become fluffy and light. You will need about 1/2 teaspoon of baking powder for a batch of 12 to 15 latkes.


How to make variations of potato latkes?

Potato latkes are a very versatile dish that can be customized in multiple ways by changing the ingredients, flavors, or cooking methods. Below are some examples of how to make different types of potato latkes:


1. Cheese potato latkes:

Add one cup of shredded cheese such as cheddar, mozzarella, or parmesan to the batter. You can also sprinkle some cheese on top of the latkes after frying them.


2. Sweet potato latkes:

Replace half or all of the potatoes with sweet potatoes, peeled and grated. You can also add some cinnamon, nutmeg, or ginger to the batter for a spicy and sweet flavor.


3. Air fryer potato latkes:

Instead of frying the latkes in oil, you can cook them in an air fryer. Preheat the air fryer to 375°F and spray the basket with cooking spray. Place the latkes in a single layer in the basket, leaving some space between them. Spray the tops of the latkes with cooking spray. Cook for 15 to 20 minutes, flipping halfway, until golden and crisp.


4. Traditional latke recipe:

For a more authentic and traditional latke recipe, you can use schmaltz, which is rendered chicken or goose fat, instead of oil. Schmaltz adds a rich and savory flavor to the latkes, and it is considered a delicacy in Jewish cuisine. You can buy schmaltz in some specialty stores, or make your own by simmering chicken or goose skin and fat in water until the fat melts and separates from the skin. Strain the fat and store it in the refrigerator or freezer until ready to use.


How healthy are potato latkes?

Potato latkes are a delicious delicacy, but they are not low-carb or light. One medium-sized potato latke, without any toppings, contains approximately 100 calories, 6 grams of fat, 10 grams of carbs, and 2 grams of protein. The nutritional content may vary depending on the ingredients and cooking methods used. Here are some advantages and disadvantages of eating potato latkes:


Pros:

Potato latkes provide potassium, vitamin C, and fiber, which are essential for maintaining your blood pressure, immune system, and digestion. They are also a traditional, festive food for Hanukkah, the Jewish holiday of lights, and can bring joy and comfort to your table.


Cons:

Potato latkes are high in calories, fat, and carbs, which can lead to weight gain, high cholesterol, and high blood sugar if consumed in large quantities. They are also not suitable for people with gluten intolerance, celiac disease, or egg allergies unless gluten-free or egg-free alternatives are used. They are also not very vegan-friendly, except if vegan cheese, sour cream, or yogurt is used.


Final Thought

Potato latkes are by far the most delicious and flexible food available at any time of year, but especially during Hanukkah. Trust me, they are so easy to make and you can customize them with your favorite ingredients and toppings to create your very own signature latkes. Whether you fry them in oil, bake them in the oven, or cook them in the air fryer, you will get a crispy, golden, and satisfying latke that will make you and your family jump with joy. So, don’t wait any longer and try this potato latkes recipe today to experience the unbeatable taste that makes it the best potato latkes recipe ever!

FAQ

Most frequent questions and answers

What is the difference between potato pancakes and latkes?

Potato pancakes and latkes are two similar dishes with some subtle differences. You can make potato pancakes from mashed or grated potatoes, with or without eggs and flour. They can also have different shapes, sizes, and flavors. Latkes, on the other hand, are a specific type of potato pancake that is made from grated potatoes, eggs, flour, and seasonings. They are usually round and flat and have a crispy and golden crust.

What is latkes made of?

The ingredients required to make latkes include grated potatoes, eggs, flour, salt, pepper, and oil. You can also add optional ingredients such as onion, garlic, parsley, cheese, or baking powder.

What type of potato is best for latkes?

The best potatoes for making latkes are starchy or all-purpose potatoes, such as Russet, Yukon Gold, or Idaho. These potatoes have a high starch content, which helps bind the latkes together and create a crispy texture.

Why is it called a latke?

The word “latke” is derived from the Yiddish word for pancake. It comes from the Old Russian word “oladka,” which means small fried cake. Latke is also related to the German word “Plätzchen,” which means cookie or biscuit.

How to store and reheat potato latkes?

To store leftover potato latkes, place them in an airtight container in the refrigerator for up to 3 days, or in the freezer for up to 3 months. To reheat them, you can either bake them in a 375°F oven for 10 to 15 minutes or microwave them for 1 to 2 minutes until they are hot and crispy.

Explore a world of culinary delights on vegetable-recipes.net! Whether you’re seeking savory sides, hearty mains, or innovative vegetable-based dishes, our homepage is your gateway to a treasure trove of flavorful recipes. Visit to discover the latest additions and elevate your vegetable-centric culinary journey!

Filed Under: Recipes Tagged With: best potato latkes recipe ever, cheese potato latkes recipe, grandma's potato latkes recipe, potato latkes origin, potato latkes recipe, potato latkes recipe air fryer, potato latkes recipe easy, sweet potato latkes recipe, traditional latke recipe, what is latkes made of?, what is the difference between potato pancakes and latkes?, what type of potato is best for latkes?, why is it called a latke?

Black Bean Pasta and Artichoke Heart: A Healthy and Delicious Meal

2024/2/7 by veg_admin Leave a Comment

black bean pasta and artichoke heart

Are you tired of the same old boring meals and looking for something new and exciting? Why not give black bean pasta and artichoke heart a try? Not only is this dish delicious, but it’s also vegan-friendly and packed with protein, fiber, iron, and antioxidants to keep you feeling satisfied and energized. 

In this blog post, we’ll share with you a step-by-step guide on how to make this mouth-watering dish and why it’s a great addition to your meal repertoire. We’ll also weigh up the pros and cons of this recipe, and answer some of the most frequently asked questions about black bean pasta and artichoke hearts. Are you ready to step up your cooking game and impress your taste buds? Let’s get started!

What is Black Bean Pasta?

Black bean pasta is a type of pasta that is made from black beans and water, and sometimes other ingredients like rice flour or tapioca starch. It is a great alternative to traditional wheat pasta as it is gluten-free, grain-free, and low in carbs. The pasta has a dark color and a mild, nutty flavor that can go well with various sauces and toppings.

How Healthy is Black Bean Pasta?

Black bean pasta is a very healthy food option, as it contains many nutrients that are beneficial for the body. One serving of black bean pasta, which is about 2 ounces or 56 grams, provides:

  • 25 grams of protein, which is 50% of the recommended daily intake for an average adult. Protein is essential for building and repairing muscles, bones, skin, and other tissues, and for making enzymes, hormones, and antibodies.
  • 12 grams of fiber, which is 48% of the recommended daily intake for an average adult. Fiber helps regulate digestion, lower cholesterol, and blood sugar levels, and keep you feeling full longer.
  • 5.7 milligrams of iron, which is 32% of the recommended daily intake for an average adult. Iron is important for transporting oxygen in the blood, supporting the immune system, and preventing anemia.
  • 84 milligrams of calcium, which is 8% of the recommended daily intake for an average adult. Calcium is vital for maintaining strong bones and teeth and supporting nerve and muscle function.
  • 120 milligrams of magnesium, which is 30% of the recommended daily intake for an average adult. Magnesium is involved in over 300 biochemical reactions in the body, such as energy production, muscle contraction, nerve transmission, and blood pressure regulation.
  • 240 milligrams of potassium, which is 7% of the recommended daily intake for an average adult. Potassium helps balance fluid and electrolyte levels, regulates heartbeat and blood pressure, and supports nerve and muscle function.
  • 2.4 milligrams of zinc, which is 22% of the recommended daily intake for an average adult. Zinc is necessary for the immune system, wound healing, taste and smell, and DNA synthesis.

In addition, black bean pasta is low in fat, sodium, and sugar, and has a low glycemic index. This means that it doesn’t cause a rapid spike in blood sugar levels after eating.

What is Artichoke Heart?

Artichoke heart is the edible part of the artichoke flower bud, which is a type of thistle plant. It is usually sold canned or jarred, but you can also find fresh or frozen artichokes in some markets. Artichoke heart has a tender and slightly sweet taste, and a meaty and fibrous texture. It can be eaten raw, cooked, or marinated, and can be added to salads, soups, dips, pizzas, pastas, and more.

How Healthy is Artichoke Heart?

In addition to being delicious, artichoke heart is also very healthy. It contains many antioxidants, vitamins, and minerals that are good for your health. A single serving of artichoke heart, which is about 3 ounces or 84 grams, provides the following:

  • 4.2 grams of protein, which is 8% of the recommended daily intake (RDI) for an average adult.
  • 6.9 grams of fiber, which is 28% of the RDI for an average adult.
  • 0.7 milligrams of iron, which is 4% of the RDI for an average adult.
  • 56 milligrams of calcium, which is 6% of the RDI for an average adult.
  • 50 milligrams of magnesium, which is 13% of the RDI for an average adult.
  • 343 milligrams of potassium, which is 10% of the RDI for an average adult.
  • 0.5 milligrams of zinc, which is 5% of the RDI for an average adult.

In addition, the artichoke heart is rich in antioxidants, such as cynarin, silymarin, luteolin, and apigenin, which help protect your cells from oxidative stress and inflammation. This may lower your risk of chronic diseases, such as cancer, diabetes, and cardiovascular disease. Artichoke heart also contains vitamin C, vitamin K, folate, and niacin, which support your immune system, blood clotting, DNA synthesis, and energy metabolism.


How to Make Black Bean Pasta and Artichoke Heart

black bean pasta and artichoke heart
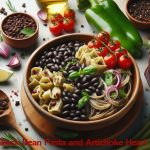
Here is a simple and quick recipe for making black bean pasta and artichoke heart using just a handful of ingredients. You will need the following:

  1. 8 ounces (226 grams) of black bean pasta
  2. 1 tablespoon of olive oil
  3. 4 cloves of garlic, minced
  4. 1/4 teaspoon of salt
  5. 1/4 teaspoon of black pepper
  6. 1/4 teaspoon of red pepper flakes (optional)
  7. 1/4 cup of vegetable broth
  8. 1/4 cup of vegan cream cheese
  9. 1/4 cup of nutritional yeast
  10. 2 tablespoons of lemon juice
  11. 1/4 cup of fresh parsley, chopped
  12. 14 ounces (396 grams) of artichoke hearts, drained and chopped


Step-by-step of Preparation

To make the dish, follow these steps:

1. Cook the black bean pasta according to the package directions, then drain and set aside.

2. In a large skillet over medium-high heat, heat the olive oil and sauté the minced garlic, salt, black pepper, and red pepper flakes (if using) for about 5 minutes until fragrant and golden.

3. Add the vegetable broth, vegan cream cheese, nutritional yeast, and lemon juice to the skillet, and whisk until the mixture becomes smooth and creamy.

4. Stir in the chopped parsley and artichoke hearts, and cook for another 10 minutes, occasionally stirring until the mixture is heated through and slightly thickened.

5. Serve the sauce over the black bean pasta, and enjoy!


Pros and Cons of Black Bean Pasta and Artichoke Heart


Black bean pasta and artichoke hearts have many pros and cons, depending on your preferences and dietary needs. Here are some of them:


Pros:


  • It is vegan, gluten-free, grain-free, and low-carb, making it suitable for people with various dietary restrictions or allergies.
  • It is high in protein, fiber, iron, calcium, magnesium, potassium, zinc, and antioxidants, which provide many health benefits, such as supporting your muscles, bones, digestion, immunity, and overall wellness.
  • It is easy and quick to make and requires only a few ingredients that are easy to find and affordable.
  • It is delicious, creamy, and satisfying, and can be customized with different herbs, spices, and toppings, such as vegan cheese, basil, pine nuts, or sun-dried tomatoes.
Cons:


  • It may not be appealing to some people who do not like the taste, color, or texture of black bean pasta or artichoke heart, or who prefer traditional wheat pasta or other types of pasta.
  • It may not be available in some stores or regions or may be more expensive than regular pasta or other alternatives.
  • It may cause some digestive issues, such as gas, bloating, or diarrhea, for some people who are not used to eating beans or artichokes, or who have sensitive stomachs or irritable bowel syndrome (IBS).
  • It may not be compatible with some medications or supplements, such as anticoagulants, diuretics, or iron pills, as black beans and artichokes may interfere with their absorption or effectiveness. Consult your doctor before eating this dish if you are taking any of these.


                 Frequently Asked Questions


1. What can you eat artichoke hearts with?

You can eat artichoke hearts with many different dishes, such as salads, soups, dips, pizzas, pasta, sandwiches, wraps, and more. You can also eat them as a snack or appetizer, with some bread, crackers, or hummus.


2. What is artichoke pasta made of?

Artichoke pasta is a type of pasta made from artichoke flour, water, and sometimes other ingredients like wheat flour or eggs. It is not the same as black bean pasta and artichoke hearts, which is a dish that combines black bean pasta and artichoke hearts. Artichoke pasta has a light green color and a subtle, earthy flavor that pairs well with various sauces and toppings.


3. What are artichoke hearts canned in?

Artichoke hearts are usually canned in water, salt, and citric acid, which help preserve their freshness and flavor. Some brands may also add other ingredients, such as vinegar, oil, herbs, or spices, to enhance their taste. You can check the label of the can to see what ingredients are included and rinse the artichoke hearts before using them to reduce the sodium content.


Ending Note

Black bean pasta and artichoke hearts make for a healthy and delicious meal that is easy to prepare and vegan-friendly. This dish is loaded with protein, fiber, iron, calcium, magnesium, potassium, zinc, and antioxidants, all of which offer numerous health benefits for your body and mind. Moreover, it is gluten-free, grain-free, and low-carb, making it a suitable option for people with various dietary restrictions or allergies. However, keep in mind that it may not be appealing or available to everyone and could cause some digestive issues or interact with certain medications or supplements. As a result, it is always advisable to check the ingredients, consult your doctor, and listen to your body before consuming this dish. If you’re looking for an innovative way to enjoy pasta and artichokes, this recipe is worth a try. You’ll be amazed at how creamy and satisfying it tastes. Bon appétit!

Explore a world of culinary delights on vegetable-recipes.net! Whether you’re seeking savory sides, hearty mains, or innovative vegetable-based dishes, our homepage is your gateway to a treasure trove of flavorful recipes. Visit to discover the latest additions and elevate your vegetable-centric culinary journey!

Filed Under: Recipes Tagged With: black bean pasta and artichoke heart, black bean pasta and artichoke hearts, how healthy is black bean pasta?, what are artichoke hearts canned in?, what can you eat artichoke hearts with?, what is artichoke pasta made of?

How to Make Houston’s Chicken Tenders Recipe at Home

2023/2/7 by veg_admin 1 Comment

houston's chicken tenders recipe

Houston’s chicken tenders recipe is one of the most popular dishes at the famous restaurant chain. These crispy, juicy, and flavorful chicken strips are a crowd-pleaser for both kids and adults. But did you know that you can make them at home with simple ingredients and easy steps? In this blog post, we’ll show you how to recreate Houston’s chicken tenders recipe in your own kitchen. We’ll also share some tips on how to make them healthier, as well as the nutritional value and pros and cons of eating chicken tenders.infographic of how to make houston’s chicken tenders recipe at home

What are chicken tenders?

Thin strips of meat from the underside of the chicken breast are called chicken tenders. They go by the names chicken nuggets, chicken fingers, and chicken strips as well. Although they can also be baked, grilled, or air-fried, chicken tenders are typically breaded and deep-fried. They are frequently served with dipping sauces like ranch, barbecue, or honey mustard.houston's chicken tenders recipe houston's chicken tenders recipe

Houston’s Chicken Tenders Recipe:How to Make 

The following ingredients are required for Houston’s chicken tenders recipe:

  • One pound of chicken breasts without the bones and skin
  • One cup of buttermilk
  • All-purpose flour, one cup
  • One teaspoon of paprika
  • Half a teaspoon of powdered garlic
  • One-half teaspoon onion powder
  • To taste, add salt and pepper
  • vegetable-based frying oil 

Step-by-step instructions:

  1. Thinly slice the chicken breasts to make tenders.
  2. Mix the buttermilk, salt, and pepper in a shallow dish.
  3. Mix the flour, paprika, onion and garlic powders, salt, and pepper in a separate shallow dish.
  4. Shake off any excess after dipping each chicken tender into the buttermilk mixture and coating it in the flour mixture.
  5. To allow the breading to set, place the coated chicken tenders on a baking sheet covered with paper towels and place them in the refrigerator for at least half an hour.
  6. A deep fryer or large skillet should have about 2 inches of oil heated to 350°F (175°C).
  7. Gently drop the chicken tenders into the heated oil, frying them for approximately five minutes on each side, or until they are cooked through and golden. If necessary, work in batches and avoid packing the pan too full.
  8. After drenching the chicken tenders with paper towels, serve them hot alongside your preferred dipping sauce.

How to Improve the Health of Houston’s Chicken Tenders Recipe:

You can try some of these changes to make Houston’s chicken tenders recipe healthier:

  • For more nutrients and fiber, use whole wheat flour instead of all-purpose flour.
  • Instead of deep-frying, use an air fryer to cut down on oil and fat. To make the chicken tenders crispier, you can also coat them with cooking spray before air-frying.
  • To cut calories and fat, use low-fat yogurt or buttermilk instead of regular buttermilk.
  • Instead of ordering chicken tenders, try skinless chicken breasts to reduce fat and cholesterol.
  • To cut back on salt, use sauces and seasonings with a low sodium content. 
  • Nutritional Value of Chicken Tenders
 

Nutritional Value of Chicken Tenders

According to the USDA, one serving (184g) of fast-food chicken tenders contains 499 calories, 25.7g of fat, 31.7g of carbs, and 35.4g of protein1. However, these numbers can vary depending on the brand and the cooking method. Chicken tenders are a good source of protein, iron, calcium, and vitamin B121. They also provide some fiber and selenium.
 

Pros and Cons of Tender Chicken

You should weigh the benefits and drawbacks of chicken tenders before consuming them. Here are a few of them:
 

Pros:

The flavor of the chicken tenders is delightful and filling. Many people find their crispy, salty, and savory flavors appealing.
  • It’s simple and convenient to prepare and consume chicken tenders. They are quick to prepare and can be eaten with a fork or your hands.
  • Tender chicken is a flexible and adaptive food. To create a variety of flavors and textures, they can be served with different sides, salads, and sauces.
  • Amino acids, which are found in chicken tenders and are rich in protein, can aid in the growth and repair of muscles, tissues, and organs.

Cons:

  • Particularly when deep-fried or covered in a thick batter, chicken tenders are heavy in fat and calories. Weight gain and health issues like high blood pressure, high cholesterol, and heart disease may result from this.
  • Due to their high sodium content, chicken tenders may result in bloating, elevated blood pressure, and fluid retention. Osteoporosis, stroke, and kidney damage can also result from excessive sodium intake.
  • Because chicken tenders are low in fiber, they may result in gastrointestinal problems like gas, bloating, and constipation. In addition, fiber lowers cholesterol, controls blood sugar, and guards against colon cancer.
  • Hormones, preservatives, and additives may be present in chicken tenders, which may be harmful to your health. Additionally, some chicken tenders might be tainted with bacteria like salmonella, which can cause food poisoning.
 

Ending Note

A tasty and simple way to enjoy chicken at home is to make Houston’s chicken tenders recipe. Nonetheless, you should be informed about the nutritional content and advantages and disadvantages of consuming chicken tenders. If necessary, you can adjust the recipe to make it healthier. If you eat chicken tenders in moderation and combine them with wholesome foods, they can be a part of a balanced diet.

FAQ

Most frequent questions and answers

Q: Why did Houston's get rid of chicken tenders?

While I don’t have specific information on why Houston’s may have removed chicken tenders from their menu, it’s not uncommon for restaurants to periodically update their offerings to accommodate changing customer preferences or to introduce new items.

What makes this the best Houston's chicken tenders recipe?

This recipe aims to capture the essence of Houston’s chicken tenders, focusing on achieving the perfect balance of tenderness and crispiness. The use of high-quality ingredients and careful attention to detail ensures a delicious result that rivals the original.

Can I bake Houston's-style chicken tenders instead of frying them?

Absolutely! This recipe provides instructions for both baking and frying, allowing you to choose the method that suits your preferences. Baking offers a slightly healthier alternative while still delivering a mouthwatering taste.

Are there any Houston's copycat recipes for their flying chicken platter?

While specific recipes for Houston’s flying chicken platter may not be readily available, you can adapt this chicken tender recipe to create a similar experience. Experiment with different sauces and sides to achieve a platter reminiscent of Houston’s flavors.

How can I make the chicken tenders extra crispy?

To achieve extra crispy chicken tenders, ensure that the coating is well-seasoned and evenly applied. Additionally, frying at the right temperature and not overcrowding the pan are crucial factors. Patting the chicken dry before coating can also enhance crispiness.

Explore a world of culinary delights on vegetable-recipes.net! Whether you’re seeking savory sides, hearty mains, or innovative vegetable-based dishes, our homepage is your gateway to a treasure trove of flavorful recipes. Visit to discover the latest additions and elevate your vegetable-centric culinary journey!

Filed Under: Recipes Tagged With: best houston's chicken tenders recipe, hardees chicken tenders recipe, hillstone chicken tenders recipe, hillstone flying chicken platter, homemade chicken tenders simple, houston's chicken tender platter, houston's chicken tenders recipe, houston's chicken tenders recipe chicken breast, houston's chicken tenders recipe easy, houston's chicken tenders recipe wiki, houston's copycat recipes, houston's fried chicken tenders recipe, tender chicken tenders recipe

Jamie Oliver’s Chicken Liver: A Culinary Masterclass

2023/2/7 by veg_admin 1 Comment

jamie oliver chicken liver recipe

Are you prepared to take your cooking to the next level and entice your palate with an incredible Jamie Oliver chicken liver recipe? The famous chef Jamie Oliver has created a masterpiece of chicken liver that is sure to please the palate. We go into the nuances of his recipe in this blog post, examining the procedures to produce a dish that is full of flavor and artistic flair.

Uncovering the Enchantment: Jamie Oliver’s Recipe for Chicken Liver

Ingredients Required

The recipe for chicken liver by Jamie Oliver is a taste symphony that dances across your tongue. To start this culinary adventure, assemble the following ingredients:

  • wholesome chicken livers
  • Olive oil
  • cloves of garlic
  • New thyme
  • Balsamic vinegar and butter
  • To taste, add salt and pepper.

Step-by-step instructions

1. Prepare and Fry

First, give the chicken livers a thorough rinse and pat them dry. Heat the olive oil in a skillet over medium-high heat. Cook the livers until they are golden brown on the outside but still very soft on the inside. Here, Jamie Oliver’s method is essential for locking in the flavors.

jamie oliver chicken liver recipe
Jamie oliver chicken liver

2. Infusing Flavors

When the livers are golden brown, toss in some minced garlic and fresh thyme. A divine aroma is produced by the aromatic infusion, heralding the start of a culinary masterpiece. Allow the flavors to combine so that the thyme can add its earthy notes and the garlic can release its essence.

3. Buttery Elegance

To enhance the dish’s richness, introduce a generous amount of butter into the skillet. Jamie Oliver often emphasizes the importance of using quality butter to elevate the overall taste. As the butter melts, it envelops the chicken livers, creating a velvety sauce that coats each piece with irresistible decadence.

4. The Balsamic Touch

For a touch of acidity and sweetness, add a splash of balsamic vinegar to the mix. This step not only balances the richness but also introduces a delightful complexity to the dish. Jamie Oliver’s choice of balsamic vinegar adds a layer of sophistication to the overall flavor profile.

Food Worth:

jamie oliver chicken liver recipe

Jamie Oliver’s recipe for chicken liver is not only delicious but also incredibly nutritious. Iron, vitamin A, and protein are among the many vital nutrients found in chicken livers. Including this recipe in your cooking is a tasty way to increase your intake of nutrients.

Pros:

Rich in nutrients:

The concentrated form of chicken livers provides all the necessary nutrients.

 
Tasty Delight: 

Jamie Oliver’s recipe turns an ordinary ingredient into a delicious dish.

Easy and quick:

This recipe can be prepared rather quickly, which makes it a good choice for people with hectic schedules likewise.

Cons:

Acquired Taste:

Not everyone has a taste for chicken livers.Moderation is key when it comes to the cholesterol content of chicken livers, despite their high nutritional value.

Ending Note

To sum up,Jamie Oliver’s recipe for chicken liver is proof of the transformational potential of culinary skill. His methodical instructions open the door to an enticing world of flavorful, rich experiences. This recipe will wow your guests and improve your culinary adventure, regardless of your experience level.


FAQ

Most frequent questions and answers

What makes Jamie Oliver's Chicken Liver recipe special?

Jamie Oliver’s recipe is well-known for its complex flavor profile, which combines delectable ingredients with skillful cooking to produce a delicious dish.

Can I substitute any ingredients in the recipe?

Although you can modify the recipe slightly to suit your tastes, using the ingredients called for guarantees the real flavor Jamie Oliver intended.

Is the recipe suitable for beginners?

All levels of cooks can use it because of the detailed instructions. Jamie Oliver places a strong emphasis on minimalism without sacrificing taste.

How long does it take to prepare the dish?

This recipe is a great option for people with hectic schedules because it comes together fairly quickly—about 20 to 30 minutes.

Are there alternatives for those who may not enjoy chicken livers?

Although the main ingredient is chicken livers, some versions add other proteins, like mushrooms, for a vegetarian twist that doesn’t sacrifice flavor.

Can I prepare this dish ahead of time?

Although it’s best eaten fresh, you can prepare some of the ingredients ahead of time. Take care because reheating could change the texture of the livers.

The recipe is versatile, and you can adapt it to fit various dietary preferences, including gluten-free or low-carb diets.

The recipe is flexible enough to accommodate different dietary requirements, such as low-carb or gluten-free diets.

What sides pair well with this dish?

To go with the chicken livers, Jamie Oliver recommends serving them with a simple salad or crusty bread.

How can I store leftovers?

If you have leftovers, refrigerate them promptly. However, note that reheating may alter the texture of the livers.

Can I freeze Jamie Oliver's Chicken Liver recipe?

Freezing is not recommended, as it may impact the texture and overall quality of the dish. Fresh preparation is key to savoring its full flavor.

Explore a world of culinary delights on vegetable-recipes.net! Whether you’re seeking savory sides, hearty mains, or innovative vegetable-based dishes, our homepage is your gateway to a treasure trove of flavorful recipes. Visit to discover the latest additions and elevate your vegetable-centric culinary journey!

Filed Under: Recipes

Amish Coconut Cream Pie Recipe : Deliciously Simple

2023/2/7 by veg_admin Leave a Comment

Amish coconut cream pie recipe

Enjoy the delicious world of desserts by indulging your taste buds with our recipe for Amish Coconut Cream Pie. This ageless classic is a tribute to the simplicity and depth of Amish culinary traditions as well as a treat for your sweet tooth.

Explore Amish Coconut Cream Pie’s Charm

The Amish coconut cream pie is a perennial favorite when it comes to comfort food. Generations of cooks have passed down this recipe, which combines the richness of cream with the goodness of coconut to create a dessert that is decadent and satisfying.

Ingredients Required

You’ll need a few basic kitchen ingredients to make this delicious dessert. assemble a homemade pie crust, sugar, eggs, milk, vanilla extract, and fresh coconut. The natural flavors of these ingredients shine through due to their simplicity, which is what makes them magical.

Step-by-step instructions:

  • First, get the pie crust ready. A buttery and flaky crust is essential, whether you choose to make your own or buy one from the store.
  • Grate the fresh coconut, being careful to extract as much sweetness as possible.
  • Whisk together eggs, sugar, and vanilla extract in a mixing bowl. Add the milk gradually while whisking to create a creamy, smooth mixture.
  • For a taste explosion in each bite, evenly distribute the grated coconut after gently folding it in.
    Fill the prepared pie crust with the delicious filling, then bake until the center sets and the top turns golden brown.
    Before serving, let the pie cool so that the flavors can combine to create a genuinely delightful bite.

Food Quality and Nutritious Advantages

The Amish coconut cream pie has some nutritional value in addition to its divine flavor. Eggs provide protein, and coconuts offer good fats. However, because of its high sugar and calorie content, it’s crucial to enjoy this dessert in moderation.

Pros and Cons:

Pros:

  • Rich, indulgent flavor.
  • Simple, traditional ingredients.
  • Easy preparation for both novice and experienced bakers.

Cons:

  • High in sugar and calories.
  • Not suitable for those with coconut allergies.
Amish coconut cream pie recipe
amish coconut cream pie recipe

FAQ

Most frequent questions and answers

Can I use sweetened shredded coconut for this recipe?

Yes, you can use sweetened shredded coconut if you prefer a slightly sweeter flavor. Adjust the sugar accordingly to maintain the balance.

Can I substitute coconut milk for regular milk?

While coconut milk can add an extra layer of coconut flavor, it may alter the texture. Stick to regular milk for the authentic Amish Coconut Cream Pie experience.

Can I make the pie crust from scratch?

Absolutely! A homemade pie crust adds a delightful touch. Find a reliable recipe or use your favorite pie crust recipe for the best results.

How long does the pie need to cool before serving?

Allow the Amish Coconut Cream Pie to cool for at least 2 hours before serving. This ensures the filling sets perfectly for a creamy texture.

Can I freeze leftovers?

While the pie is best enjoyed fresh, you can freeze leftovers. Wrap slices individually and store them in an airtight container for up to one month. Thaw in the refrigerator before serving.

What can I serve with Amish Coconut Cream Pie?

Enjoy it on its own or pair with a dollop of whipped cream for extra indulgence. Fresh berries or a sprinkle of toasted coconut can also complement the flavors.

Can I make this pie ahead of time for an event?

Yes, you can make the pie a day in advance. Store it in the refrigerator, and bring it to room temperature before serving for the best taste and texture.

Explore a world of culinary delights on vegetable-recipes.net! Whether you’re seeking savory sides, hearty mains, or innovative vegetable-based dishes, our homepage is your gateway to a treasure trove of flavorful recipes. Visit to discover the latest additions and elevate your vegetable-centric culinary journey!

Filed Under: Recipes Tagged With: Amish coconut cream pie recipe

Salmon Loaf Recipe with Mayonnaise: The Perfect Blend of Flavor

2023/2/7 by veg_admin 3 Comments

salmon loaf recipe with mayonnaise

Our recipe for Salmon Loaf with Mayonnaise and Sour Cream is the perfect choice if you’re searching for a delicious yet wholesome supper. This gourmet creation is a powerhouse of nutrition as well as a pleasure for the senses. It mixes the rich flavors of salmon with the creamy goodness of mayonnaise and sour cream.

A Culinary Delight: Salmon Loaf Recipe with Mayonnaise and Sour Cream
 

Ingredients Required

  • One-pound fresh fillet of salmon
  • one-half cup mayonnaise
  • Half a cup of sour cream
  • breadcrumbs, one cup
  • two eggs
  • 1/4 cup of freshly chopped dill
  • 1/4 cup of red onion, chopped finely
  • Add pepper and salt to taste.

 Instructions :

    1. 1. Preheat your oven to 375°F (190°C).
    2. 2. In a food processor, pulse the salmon until finely chopped.
    3. 3. In a large bowl, combine the chopped salmon, mayonnaise, sour cream, breadcrumbs, eggs, dill, red onion, salt, and pepper. Mix until well combined.
    4.  
salmon loaf recipe with mayonnaise
  1. 4. Shape the mixture into a loaf and place it in a greased baking dish.
  2. 5. Bake for 30-35 minutes or until the top is golden brown and the salmon is cooked through.
  3. 6. Let it rest for a few minutes before slicing and serving.

The Ideal Combination of Tastes:

The flavors of our salmon loaf with sour cream and mayonnaise are well balanced. The inherent richness of the salmon is complemented by the creamy texture of the sour cream and mayonnaise, making for a savory and filling dish. These components work well together to improve the flavor overall, which makes it a favorite for special events or family gatherings.

Value nutrient-wise:

Not only is this salmon loaf tasty, but it is also incredibly nutritious.Omega-3 fatty acids are critical for heart function and are abundant in salmon. The meal gains a velvety smoothness and healthful fats from the sour cream and mayonnaise. The addition of eggs gives this recipe an extra protein boost, making it a complete and healthy dinner.

Advantages:

  • rich in heart-healthy omega-3 fatty acids.
  • High in protein, which supports the growth and repair of muscle.
  • A dish’s creamy texture gives it a pleasant mouthfeel.
  • Adaptable – ideal for special events as well as informal gatherings.

Drawbacks

  • Possibly heavy in calories because it contains sour cream and mayonnaise.
  • Those who are allergic to seafood should be careful.
To sum up, our recipe for Salmon Loaf with Mayonnaise and Sour Cream is a delicious dish that fulfills your dietary requirements and palate. This dish is a must-try for any seafood lover, with the ideal balance of flavors and many health advantages. This salmon loaf will look great whether you’re preparing for a formal event or a family meal. Savor the deliciousness of salmon with every bite, complemented by the creamy notes of sour cream and mayonnaise!

FAQ

Most frequent questions and answers

Q1: Can I use canned salmon for this recipe?

It is possible to replace fresh salmon with tinned salmon. Before using the canned salmon in the recipe, be careful to drain it.

Can I make this dish ahead of time?

Definitely! The loaf should be ready, covered, and chilled. When ready to serve, bake in the manner specified.

Can I use Greek yogurt instead of sour cream?

Greek yogurt, which keeps its creamy texture, might be a healthier substitute for sour cream.

Explore a world of culinary delights on vegetable-recipes.net! Whether you’re seeking savory sides, hearty mains, or innovative vegetable-based dishes, our homepage is your gateway to a treasure trove of flavorful recipes. Visit to discover the latest additions and elevate your vegetable-centric culinary journey!

Filed Under: Recipes

Tasty Japanese Eggplant Roast: An Ideal Recipe for Pleasure

2023/2/7 by veg_admin 1 Comment

Recipe for japanese eggplant roasted

Do you want something tasty and healthful to eat? You’ve found it! We’ll look at the best “Recipe for Japanese Eggplant Roasted” in this post. This easy-to-make but delicious recipe will help you showcase the savory, rich flavor of Japanese eggplant. Explore the realm of delectable tastes as we uncover the secrets of flawlessly roasted Japanese eggplant!

The Ideal Recipe for Roasted Japanese Eggplant

Main Components:

Japanese Olive Oil for Eggplants

  • Sauce Soy
  • In Mirin
  • Mustard Oil
  • Grated ginger, minced garlic,
  • Add pepper and salt to taste.
  • Peanuts (as a garnish)

Guidelines for Roasted Japanese Eggplant:

  • Set oven temperature to 400°F, or 200°C.
  • Clean the Japanese eggplant and cut it lengthwise.
  • To make a tasty marinade, combine olive oil, soy sauce, mirin, minced garlic, grated ginger, salt, and pepper in a bowl.
  • Make sure that all of the sliced eggplant is thoroughly coated by generously brushing it with marinade.
  • Spread the eggplant slices on a baking sheet and roast, turning halfway through, for 20 to 25 minutes, or until golden brown.
  • For the ideal finishing touch, after roasting, drizzle with sesame oil and sprinkle with sesame seeds.

Food Worth:

Japanese eggplant has a lot of nutrients in addition to being delicious. It is a great option for a healthy diet because it is high in fiber and low in calories. The roasted variety offers a distinct smoky flavor while preserving vital nutrients. Rich in vitamins, minerals, and antioxidants, this dish supports general health.

Recipe for japanese eggplant roasted
recipe for japanese eggplant roasted

Advantages:

Japanese eggplant is a healthy choice because it is high in fiber and low in calories, making it a part of a balanced diet.

Rich in Nutrients:

The dish’s nutritional value is preserved by the eggplant, which supplies vital vitamins and minerals.

Versatile Flavor:

Soy sauce,mirin,and sesame oil come together to produce a delicious umami flavor that goes well with a variety of dishes.

Drawbacks

Texture Sensitivity:

 If roasted eggplant isn’t cooked to perfection, some people might not find its texture to be as appealing.

Allergy Alert: 

Make sure visitors aren’t allergic to any of the components, particularly the soy sauce or sesame seeds.

As we come to the end of our culinary exploration, this recipe for perfectly roasted Japanese eggplant offers your taste buds more than just a meal. This recipe lets you enjoy the flavors of Japanese cuisine in the comfort of your own home with a harmonious blend of flavors and ease of preparation. Savor the rich, umami flavor and smoky aroma that characterize this delicious dish as soon as you take that first bite. This recipe will become a mainstay in your repertoire, delighting every palate it touches, regardless of your level of culinary experience. Take your eating to the next level and start this never-ending journey of crafting delicious moments with every perfectly roasted Japanese eggplant slice. 

FAQ

Most frequent questions and answers

Can I use regular eggplant instead of Japanese eggplant?

Regular eggplant can be substituted, but Japanese eggplant works well in this recipe because of its milder flavor and slender shape.

Can I skip the mirin in the marinade?

A hint of sweetness and depth is added by the mirin. You can leave it out if it’s not available, but it adds to the flavor profile overall.

How do I ensure the eggplant is perfectly roasted without burning?

Pay special attention to the oven. Roast for 1 hour at 400°F (200°C), turning once. Adapt the time according to how well your oven works.

Can I prepare this dish ahead of time?

Definitely! When the eggplant is ready, marinate it ahead of time and roast it. For busy schedules, it’s a great make-ahead option.

Any suggestions for improving the dish even more?

For an added personal touch, try experimenting with extra herbs like basil or thyme. The flavors can also be enhanced with a squeeze of lemon or a sprinkle of feta.

Is this recipe suitable for a vegan diet?

The recipe is totally vegan, yes. Make sure the mirin and soy sauce you buy are vegan-friendly brands.

Can I grill the eggplant instead of roasting it?

Definitely! Charring imparts a deliciously smoky flavor. Apply the marinade, then grill until the food is soft.

What side dishes pair well with roasted Japanese eggplant?

It goes well with rice, quinoa, or as a savory garnish for a summer salad. It goes nicely with many greens and grains.

How long can I store leftover roasted eggplant?

Keep leftovers in the fridge for up to two days in an airtight container. Warm through in the microwave or oven for an easy and delicious meal.

Freezing may alter the texture, but you can freeze it for up to one month. Thaw and reheat in the oven for the best results.

You can freeze it for up to a month, but it might change texture when frozen. For best results, thaw and reheat in the oven.

Nutrition:

This delicious delicacy,Hilltop Steakhouse Lobster Pie, offers a special fusion of flavors and essential nutrients. Here’s a summary of its nutritional worth and the benefits and drawbacks of indulging in this salty dessert.

Advantages:

Full of Protein:

If you’re trying to maintain or gain muscle, lobster is a fantastic option because it’s a wonderful source of lean protein. About 25 grams of protein can be found in a 3.5-ounce portion of lobster meat.

Low in Fat: 

Saturated fat, in particular, is not present in a lot of lobster. This means that you can enjoy it without worrying about consuming too much fat because it’s a heart-healthy alternative.

Minerals and vitamins: 

B vitamins, including B12, zinc, and selenium are among the vital minerals and vitamins found in lobster. B12 is necessary for healthy nerves, and zinc and selenium are important for immune system function and general well-being.Lobster is an excellent source of omega-3 fatty acids, which have been linked to a number of health advantages, including the reduction of inflammation, enhancement of heart health, and promotion of brain function.

Low in Calories: 

Although the pastry crust and creamy sauce include calories, the lobster meat provides the majority of the calories. This means you can have a nice lunch without consuming too many calories.

Delightful and Contenting: 

The flaky pastry crust together with the rich, creamy texture of the lobster pie creates a really filling dinner that can quell your cravings and offer comfort.

Drawbacks:

High in Cholesterol: 

Due to their natural high cholesterol content, lobster may be unsuitable for anyone with cholesterol-related medical conditions. It is suggested that people with high cholesterol consume lobster in moderation.

Caloric Density: 

The dish’s caloric density can be considerably increased by the addition of butter, heavy cream, and pastry dough, which makes it less suited for people following a strict calorie-restricted diet even though the lobster meat itself has a relatively modest calorie count.

Allergies: 

Some people may have a shellfish allergy, which includes lobster. If you have a known shellfish allergy, it’s crucial to be aware of potential allergens and stay away from this dish.

Lobster pie from Hilltop Steakhouse is a delectable treat that provides a healthy mix of vital nutrients and protein. Although it has several health advantages, you should be aware of its greater sodium, cholesterol, and calorie content. Enjoy this delectable New England favorite in moderation, as with any dish, and be mindful of your nutritional needs and any particular health problems or health risk.

Filed Under: Recipes

Succulent Treats: Pampered Chef Flan Pan Recipes Disclosed

2023/2/7 by veg_admin Leave a Comment

Pampered chef flan pan recipes

Are you looking for delicious sweets that are visually beautiful as well as simple to prepare? You only need to look at our carefully chosen selection of Pampered Chef flan pan recipes! We provide everything to satisfy your sweet craving, from inventive twists to timeless favorites. Come along on a culinary adventure as we prepare decadent delicacies that will have your guests hankering after more, all while discovering the culinary possibilities of the Pampered Chef flan pan.

Cracking the Code: Gourmet Flan Pan Recipes

1. Magically Delicious Chocolate Lava Cake

Enjoy the enticing appeal of our Pampered Chef Flan Pan Rich Chocolate Lava Cake by sinking your teeth into it. This recipe creates a molten masterpiece out of a basic mixture of components. A dessert that will elevate any occasion, the flan pan’s distinctive design assures the ideal balance of gooey chocolate center and moist cake shell.

2. Lemon Bars with Flan Pan Infusion of Zest

Make Pampered Chef Flan Pan Lemon Bars when life hands you lemons! This zesty take on a traditional dessert bakes to perfection in our flan pan, combining the tart flavor of lemons with a buttery crust. The outcome? A zesty delight that pleases the eyes and the palate equally.

3. Bits of Berry Bliss Cheesecake

With our Pampered Chef Flan Pan Berry Bliss Cheesecake Bites, you can up your dessert game. With a rich fusion of cream cheese and fresh berries, these bite-sized treats deliver a flavor explosion with each bite. The individual molds in the flan pan make serving a breeze, making it ideal for stylishly entertaining guests.

4. Cake with Caramel Apple Inversion

With this Pampered Chef Flan Pan Caramel Apple Upside-Down Cake, take a trip down memory lane. The rich tastes of caramel and cinnamon-spiced apples come together in this cozy dessert to create a visually stunning dish that is both sophisticated and rustic. The flan pan’s shape guarantees uniform baking, which produces perfectly caramelized cake that will make your guests want for more.

Benefits of the Pampered Chef Flan Pan: 

Food Value

Beyond its ability to be used to create a variety of delicious desserts, the Pampered Chef Flan Pan has other benefits that make it an indispensable kitchen tool:

Pampered chef flan pan recipes

Advantages:

Versatility: 

The distinctive design of the flan pan enables the preparation of a wide range of desserts, from creative cakes and bars to classic flans.


Individual Servings: 

Your desserts will seem more elegant and sophisticated thanks to the individual molds, which also simplify serving and presentation.


Even Baking: 


The structure of the flan pan guarantees even heat distribution, which produces consistently flawlessly baked goods.


Non-Stick Coating: 

This coating makes cleanup easy and saves you time and work in the kitchen.


Drawbacks

Storage Space: 

Because of its distinctive design, the flan pan could require a little bit more room for storage than other baking pans.


Specialized Use:

 Although very adaptable, the flan pan works well for recipes calling for desserts, therefore its use is limited to individuals who like multipurpose kitchenware.


To sum up, the Pampered Chef Flan Pan is a culinary innovation that gives dessert lovers endless alternatives. Our assortment of recipes offers a comprehensive tutorial for crafting remarkable sweets that will impress your loved ones, regardless of your level of baking experience. Discover the Pampered Chef Flan Pan’s magic and savor the sweet satisfaction of producing visually stunning desserts that are as delicious as they are.

FAQ

Most frequent questions and answers

What makes the Pampered Chef Flan Pan unique?

The Pampered Chef Flan Pan is unique because of its unique design, which has separate molds that are ideal for precisely creating a range of desserts.

Is the Pampered Chef Flan Pan only for making flans?


No, the Flan Pan’s uses are not limited to flans. This multipurpose tool may be used to make cheesecake bites, cakes, bars, and more.

How easy is it to clean the Pampered Chef Flan Pan?

The non-stick surface makes cleaning a snap. For best results, we advise hand cleaning; however, some models can be dishwasher safe.

What are the advantages of using the Pampered Chef Flan Pan for baking?

The Flan Pan has a nonstick surface for effortless release, separate servings for a sophisticated presentation, and even baking.

What are the advantages of using the Pampered Chef Flan Pan for baking?

The Flan Pan has a nonstick surface for effortless release, separate servings for a sophisticated presentation, and even baking.

Any tips for using the Pampered Chef Flan Pan effectively?

Grease or line the pan appropriately, preheat the oven as instructed, and adhere to the recommended baking times. For optimal results, let desserts cool before removing them.

Can the Pampered Chef Flan Pan be used in a convection oven?

Yes, for the most part. Standard and convection ovens can safely use the flan pan. Always consult the product manual for the particular model you are using.

Does Pampered Chef offer Flan Pan-specific recipes?

Indeed, Pampered Chef offers a range of recipes designed just for the Flan Pan. These are available at Pampered Chef cooking demonstrations, in cookbooks, and on their official website.

Can savory dishes be made in the Pampered Chef Flan Pan?

Though mainly meant for desserts, inventive chefs have also tried savory creations, such as little quiches or tarts. Adapt cooking temperatures and times accordingly.

Is the Pampered Chef Flan Pan suitable for occasional bakers?

Certainly. The versatility and ease of use of the Flan Pan make it a great asset to any kitchen, regardless of baking experience.

Where can I purchase a Pampered Chef Flan Pan?

The company’s website, authorized consultants, and Pampered Chef cooking demonstrations are the places to purchase Pampered Chef flan pans. To find out whether a product is available and how to buy it, visit the official website.

What tools are recommended for Pampered Chef flan pan recipes?

The list includes a cup slicer, stone fruit wedger, and extra-large scoop. Additionally, an eight-inch square pan with a lid is mentioned for specific recipes.

Are there specific steps highlighted in the provided keywords?

Yes, steps such as crust preparation, cutting holes in the bottom, and using the new stone fruit wedger are mentioned in the context of flan pan recipes.

What types of recipes are covered for the flan pan?

The keywords indicate dessert, chicken, and bread recipes tailored for the Pampered Chef flan pan.

Are there specific instructions for the Pampered Chef tart pan?

Yes, there are mentions of Pampered Chef tart pan recipes, suggesting dedicated instructions for this particular tool.

Can I find a combined recipe for flan and tart using the pan?

Yes, the keywords include references to flan tart pan recipes, indicating a combination of flan and tart elements using the pan.

Where can I purchase a Pampered Chef Flan Pan?

The company’s website, authorized consultants, and Pampered Chef cooking demonstrations are the places to purchase Pampered Chef flan pans. To find out whether a product is available and how to buy it, visit the official website.

Filed Under: Recipes

  • Go to page 1
  • Go to page 2
  • Go to page 3
  • Interim pages omitted …
  • Go to page 5
  • Go to Next Page »

Primary Sidebar

zippy's macaroni salad recipe hawaii

Hawaiian chopped steak recipe

Craving a taste of the Hawaiian islands? Look no further than Zippy's Macaroni Salad Recipe, a culinary delight that … [Read More...] about Hawaiian chopped steak recipe

1950s recipe for tamale pie

1950s Tamale Pie: A Taste of Vintage Comfort Food

Is your kitchen lacking a touch of comfort and nostalgia? You've found it! This blog post will take you on a lovely … [Read More...] about 1950s Tamale Pie: A Taste of Vintage Comfort Food

রোধ, জল, বৃষ্টি

রোধ, জল, বৃষ্টি। ৬ষ্ঠ শ্রেনী। বিজ্ঞান-অনুশীলন বই

আমরা ষষ্ঠ শ্রেনীর বিজ্ঞান-অনুশীলন বইয়ের ৪র্থ অধ্যায়ে আলোচিত "রোধ, জল, বৃষ্টি"-শিখন অভিজ্ঞতার মধ্য দিয়ে বিভিন্ন ধরনের … [Read More...] about রোধ, জল, বৃষ্টি। ৬ষ্ঠ শ্রেনী। বিজ্ঞান-অনুশীলন বই

গতির খেলা-৬ষ্ট শ্রেণী

গতির খেলা। ৬ষ্ঠ শ্রেনী। বিজ্ঞান-অনুশীলন বই

এই পোস্টে আমরা জানবো ষষ্ঠ শ্রেনীর বিজ্ঞান বিষয়ের ৩য় শিখন অভিজ্ঞতা গতির খেলা  সম্পর্কে। প্রথম, দ্বিতীয় ও … [Read More...] about গতির খেলা। ৬ষ্ঠ শ্রেনী। বিজ্ঞান-অনুশীলন বই

ক্ষুদে বাগানঃটেরারিয়াম।সপ্তম শ্রেণী| বিজ্ঞান- অনুশীলন বই

এই পোস্টে আমরা সপ্তম শ্রেনীর বিজ্ঞান অনুশীলন বইয়ের ৭ম অধ্যায়,ক্ষুদে বাগানঃটেরারিয়াম  সম্পর্কে জানবো। প্রথম ও … [Read More...] about ক্ষুদে বাগানঃটেরারিয়াম।সপ্তম শ্রেণী| বিজ্ঞান- অনুশীলন বই

হরেক রকম খেলনার মেলা

হরেক রকম খেলনার মেলা।সপ্তম শ্রেণী| বিজ্ঞান- অনুশীলন বই

এই পোস্টে আমরা সপ্তম শ্রেনীর বিজ্ঞান অনুশীলন বইয়ের ৬ষ্ঠ অধ্যায়,হরেক রকম খেলনার মেলা  সম্পর্কে জানবো।প্রথম ও দ্বিতীয় … [Read More...] about হরেক রকম খেলনার মেলা।সপ্তম শ্রেণী| বিজ্ঞান- অনুশীলন বই

Footer

  • About Us
  • Affiliate Disclosure
  • Privacy Policy
  • Terms of Use
  • Contact Us

Copyright © 2025 · News Pro on Genesis Framework · WordPress · Log in