• Skip to primary navigation
  • Skip to main content
  • Skip to primary sidebar
  • Skip to footer

Kitchen Academy

Unleash your culinary potential at Kitchen Academy. Learn essential skills, discover delicious vegetable recipes, and explore all things kitchen

  • Home
  • Recipes
  • Education
    • class 6
      • বিজ্ঞান class 6
    • Class 7
      • বিজ্ঞান class 7
    • Class 8
      • বিজ্ঞান class 8
    • class 9
      • বিজ্ঞান class 9

Recipes

Cracking the Code: Little Caesars Pizza Dough Recipe Disclosure

2023/2/7 by veg_admin Leave a Comment

little caesar's pizza dough recipe

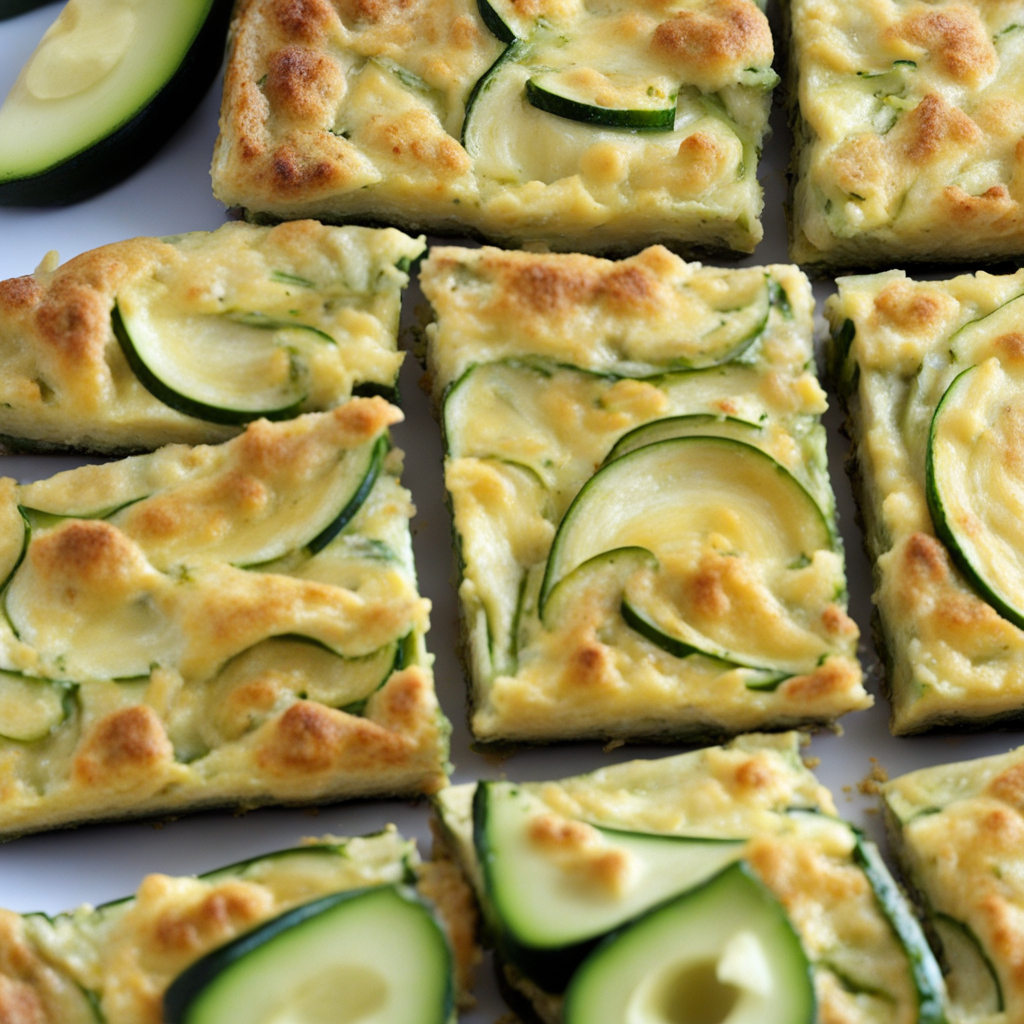
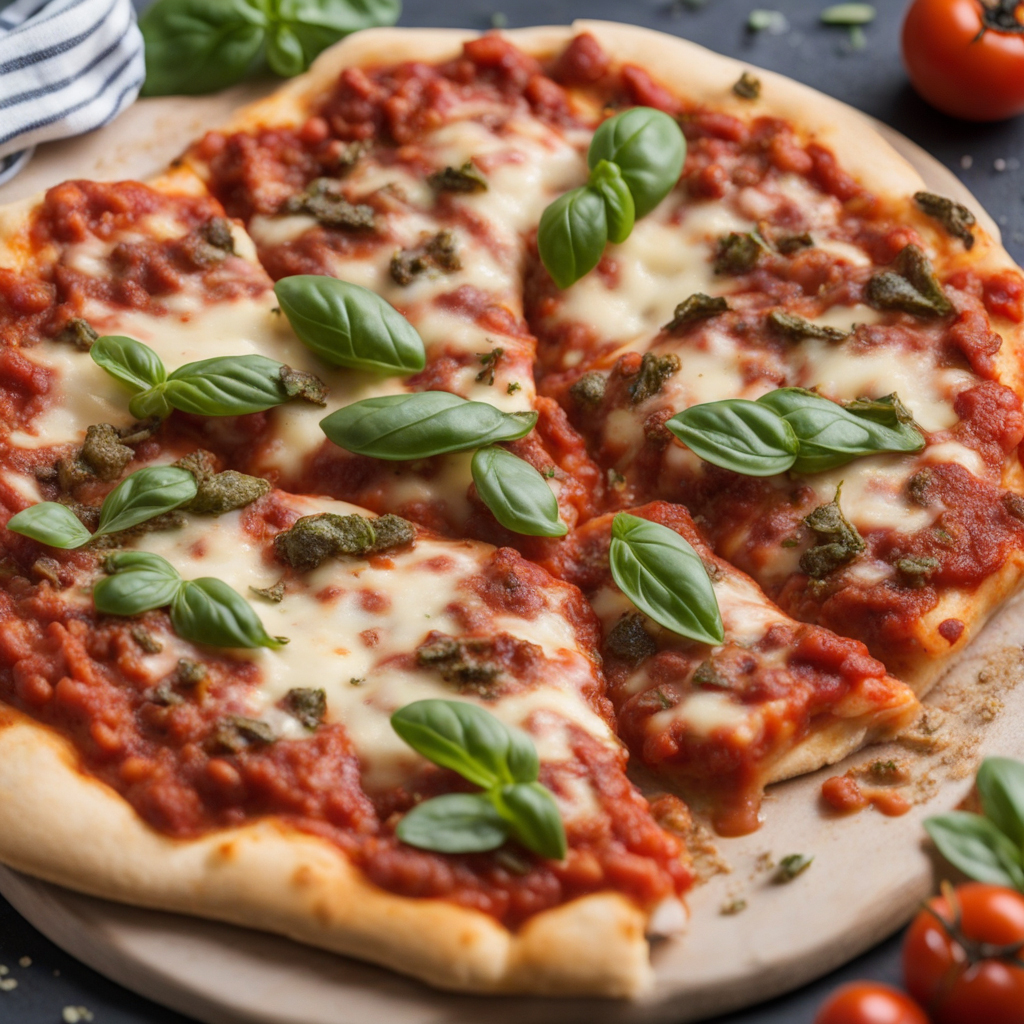
Do you yearn for the ideal pizza experience? You need look no further than using the highly sought-after Little Caesars pizza dough recipe to create your own masterpiece. We’ll explore the techniques used in the dough that really set Little Caesar’s pizzas apart in this blog post. Discover the essential components, the detailed method, and the benefits and drawbacks of making this delicious dough in the convenience of your own kitchen.

The Magic Ingredients:

Let’s take a deeper look at the essential components that give Little Caesars pizza dough its distinctive flavor and texture before we set out to recreate it.The main ingredients of this recipe are fine flour, water, yeast, sugar, salt, and a small amount of olive oil. Together, these basic yet essential ingredients provide the ideal ratio of crispiness to chewiness.

How to Make Little Caesars Pizza Dough at Home, Step-by-Step

1. Gather all the components that are needed:

Four cups of all-purpose flour, one tablespoon each of sugar and salt, two tablespoons of olive oil, one and a quarter teaspoons of active dry yeast, and one and a half cups of warm water.

2. Let the yeast ferment

Put the yeast, sugar, and warm water in a basin. After the liquid turns frothy, showing that the yeast is activated, let it sit for five to ten minutes.

3. Combine the Dough

Flour and salt should be combined in a large mixing dish. Add the olive oil and the mixture of activated yeast. Work the dough into a smooth, elastic ball.

little caesars pizza dough recipe
4. Allow it to Rise

Once the dough has doubled in size, cover it with a damp cloth and let it rise in a warm location for around one hour.

5. Form and Cook

Once the dough has risen, punch it down, roll it out into the shape you want, top it with your preferred ingredients, and bake it in a preheated oven until golden brown.

Self-made Little Caesars Pizza Dough Benefits:

Personalization:

Making your own pizza dough lets you to around with different cheeses, sauces, and toppings to suit your personal tastes.

Freshness :

Moreover, using freshly prepared dough guarantees that your pizza is made with high-quality, fresh ingredients, which improves its flavor and nutritional content overall.

Economical :

Preparing your own Little Caesars pizza dough is an economical substitute for getting takeaway, offering both financial and culinary advantages.

Against Making Your Own Little Caesars Pizza Dough:

Time-consuming:

Compared to ordering a ready-made pizza, this method takes longer because the dough needs time to rise and rest.

Expertise:

Mastering the ideal blend of flavor and texture could take some getting used to, and it could be a little difficult at first for newcomers.

A stand mixer or a lot of hand kneading may be necessary to achieve the perfect results, even with the simple ingredients. This could be a disadvantage for people without specialized kitchen equipment.

Food value :

A nutritious dinner with a well-balanced intake of carbohydrates, proteins, and fats can be prepared at home using Little Caesars pizza dough. The quantity and quality of the ingredients you use to make your pizza can be adjusted to suit your dietary needs and tastes.

Finally, making your own Little Caesars pizza dough is a fun and fulfilling endeavor. You also get to enjoy the flexibility to personalize your pie to the hilt and get a fresh respect for the craft of cooking pizza. Enjoying your own Little Caesars Pizza is a delightful gastronomic experience, especially when you consider how easy the ingredients are to make. By perfecting the Little Caesars pizza dough recipe at home, you may uncover the key to the ultimate pizza evening. The effort will pay off in terms of pleasing your taste senses and possibly your pocketbook.

FAQ

Most frequent questions and answers

Can I use whole wheat flour for the pizza dough?

For a healthy option, you can replace all or part of the all-purpose flour with whole wheat, though it will somewhat change the texture.

How long should I let the dough rise?

After the dough has doubled in size, let it rise for about an hour. A warm atmosphere is essential for the best rising.

Can I freeze the dough for later use?

After the dough has risen, it is possible to freeze it. Before using, thaw it in the fridge and allow it to come to room temperature for optimal effects.

Is a stand mixer necessary, or can I knead by hand?

Although a stand mixer simplifies the procedure, you can achieve a more manual method by kneading the dough by hand.

What temperature of oven is best for baking pizza?

For the ideal crispy crust, preheat your oven to 475°F (245°C). Adapt according to the performance of your oven.

Can I prepare the dough in advance for later use?

Definitely! Additionally, to increase flavor, prepare the dough, let it rise, and then refrigerate for up to 24 hours before shaping and baking.

How thick or thin should I roll out the pizza crust?

One’s preference determines the thickness. Aim for a medium crust for a traditional Little Caesars-style pizza.

Filed Under: Recipes Tagged With: Little Caesars Pizza

Lobster Bliss: A Guide to Hilltop Steakhouse’s Irresistible Pie

2023/2/7 by veg_admin Leave a Comment

Hilltop steakhouse lobster pie recipe

Recipe for Hilltop Steakhouse Lobster Pie is the ideal option if you’re searching for a genuinely delightful culinary experience. This delicious New England dish promises a tantalizing combination of rich sauce, crispy pastry crust, and tender lobster meat. We’ll walk you through every step of the process of making this traditional recipe in your own kitchen in this blog post. So get ready to go on a tasty journey with us, whether you love shellfish or are just looking to try something new.

A New England Tradition: Lobster Pie at Hilltop Steakhouse

Let’s take a moment to recognize the rich culinary legacy of New England, where seafood is the ultimate ingredient, before getting into the recipe itself. People from this area have a particular fondness for lobster, and lobster pie is a dish that perfectly captures the flavorful essence of the sea.

Ingredients Required:

Before you can begin making this delicious Lobster Pie,gather the necessary ingredients:

  • Two pounds of freshly cooked, chopped lobster meat
  • Four Tbsp of butter
  • Two tablespoons of flour for all purposes
  • a single cup heavy cream
  • One cup of lobster consommé
  • A quarter cup of dry sherry
  • Grated Parmesan cheese, 1/4 cup
  • Two puff pastry sheets
  • One egg for the egg wash
  • Add pepper and salt to taste.

Step-by-step instructions:

Follow these instructions to make this delicious hilltop steakhouse lobster pie recipe.

1. Set your oven’s temperature to 400°F (200°C).

2. Melt the butter in a large saucepan over a medium heat. Incorporate the all-purpose flour and blend until a uniform, golden roux takes shape.

3. Make sure the mixture stays lump-free and smooth by gradually whisking in the heavy cream, lobster broth, and dry sherry.

4. Stir the sauce and cook it until it thickens while adding the grated Parmesan cheese.

5.  Add the diced lobster meat and stir to coat it evenly with sauce. To taste, add salt and pepper for seasoning.

Hilltop steakhouse lobster pie recipe
Hilltop steakhouse lobster pie

6. Unroll a single pastry puffs sheet and transfer it to a pie plate. Transfer the lobster mixture into the dish lined with pastry.

7. Trim any excess puff pastry and seal the edges before covering the lobster filling with the second sheet. Apply an egg wash to the top for a gorgeous golden appearance.

8. Bake for 30 to 35 minutes in a preheated oven, or until the filling is bubbling and the pastry is golden brown.

Presenting and Providing

Thus,take your Hilltop Steakhouse Lobster Pie out of the oven when it’s bubbling and gorgeously golden. Let it cool for a couple of minutes, then cut into slices and serve. This dish is excellent served with sautéed vegetables or a crisp garden salad.

Lately,recipe for Hilltop Steakhouse Lobster Pie is a delicious exploration of New England flavors. It’s a dish that never fails to impress with its golden, flaky pastry crust and rich, creamy lobster filling. This recipe is sure to become a family favorite and it is easy to follow, whether you’re making it for a special occasion or just want to treat yourself to a taste of the sea.

So,why hold off? Gather the ingredients in your kitchen and get to work making your very own Hilltop Steakhouse Lobster Pie. Your palate will appreciate it.

Nutrition:

This delicious delicacy,Hilltop Steakhouse Lobster Pie, offers a special fusion of flavors and essential nutrients. Here’s a summary of its nutritional worth and the benefits and drawbacks of indulging in this salty dessert.

Advantages:

Full of Protein:

If you’re trying to maintain or gain muscle, lobster is a fantastic option because it’s a wonderful source of lean protein. About 25 grams of protein can be found in a 3.5-ounce portion of lobster meat.

Low in Fat: 

Saturated fat, in particular, is not present in a lot of lobster. This means that you can enjoy it without worrying about consuming too much fat because it’s a heart-healthy alternative.

Minerals and vitamins: 

B vitamins, including B12, zinc, and selenium are among the vital minerals and vitamins found in lobster. B12 is necessary for healthy nerves, and zinc and selenium are important for immune system function and general well-being.Lobster is an excellent source of omega-3 fatty acids, which have been linked to a number of health advantages, including the reduction of inflammation, enhancement of heart health, and promotion of brain function.

Low in Calories: 

Although the pastry crust and creamy sauce include calories, the lobster meat provides the majority of the calories. This means you can have a nice lunch without consuming too many calories.

Delightful and Contenting: 

The flaky pastry crust together with the rich, creamy texture of the lobster pie creates a really filling dinner that can quell your cravings and offer comfort.

Drawbacks:

High in Cholesterol: 

Due to their natural high cholesterol content, lobster may be unsuitable for anyone with cholesterol-related medical conditions. It is suggested that people with high cholesterol consume lobster in moderation.

Caloric Density: 

The dish’s caloric density can be considerably increased by the addition of butter, heavy cream, and pastry dough, which makes it less suited for people following a strict calorie-restricted diet even though the lobster meat itself has a relatively modest calorie count.

Allergies: 

Some people may have a shellfish allergy, which includes lobster. If you have a known shellfish allergy, it’s crucial to be aware of potential allergens and stay away from this dish.

Lobster pie from Hilltop Steakhouse is a delectable treat that provides a healthy mix of vital nutrients and protein. Although it has several health advantages, you should be aware of its greater sodium, cholesterol, and calorie content. Enjoy this delectable New England favorite in moderation, as with any dish, and be mindful of your nutritional needs and any particular health problems or health risk.

FAQ

Most frequent questions and answers

Can I use frozen lobster meat for the recipe?

Certainly! Ensure it’s fully thawed and pat it dry before incorporating it into the dish for optimal flavor and texture.

Are there any suitable substitutes for sherry in the recipe?

Sure, you may use dry white wine or chicken broth in place of sherry; just modify the amounts to suit your taste.

Can I prepare the Lobster Pie ahead of time?

Of course! Pie should be assembled and chilled before baking. When ready to serve, bake for a taste as good as it does just out of the oven.

Is it possible to make a smaller portion of the Lobster Pie?

Of course! For a smaller serving, adjust ingredient quantities appropriately, keeping proportions the same to provide a well-balanced flavor.

How do I prevent the pastry from becoming soggy?

Pie should be baked in a warmed oven to avoid sogginess. Before assembling, make sure the lobster filling is not overly liquid.

Can I freeze the Lobster Pie for later use?

You can freeze the assembled but unbaked pie, yes. Bake it straight out of the freezer, taking a little longer to bake when you’re ready to eat it.

What side dishes pair well with the Lobster Pie?

The richness of the Lobster Pie is enhanced with side dishes of roasted potatoes, sautéed vegetables, or fresh salads.

Can I use store-bought puff pastry for convenience?

Of course! Choose a high-quality puff pastry from the shop to save time in the kitchen without sacrificing flavor.

How can I enhance the flavor of the Lobster Pie?

Try experimenting with more herbs, such as paprika or thyme, to give the taste profile a unique flair.

Is the Lobster Pie suitable for individuals with seafood allergies?

No, it’s not appropriate. To guarantee a secure and pleasurable eating experience for individuals who are allergic to shellfish, take into account substitute dishes.

Explore a world of culinary delights on vegetable-recipes.net! Whether you’re seeking savory sides, hearty mains, or innovative vegetable-based dishes, our homepage is your gateway to a treasure trove of flavorful recipes. Visit to discover the latest additions and elevate your vegetable-centric culinary journey!

To learn about all sorts of boots and shoes, visit Firesfeet.

Filed Under: Recipes

Recipe for Jackson Vanilla Wafers Banana Pudding Is Delectably Southern

2023/2/7 by veg_admin 1 Comment

jackson vanilla wafers banana pudding recipe

This recipe for Jackson Vanilla Wafers Banana Pudding is the perfect dessert to make if you’re looking for something that captures the sweet, comforting flavors of the South. We’re here to walk you through the process of making a delicious banana pudding that will have your taste buds dancing with joy. This traditional Southern treat is a timeless favorite. Regardless of your level of experience in the kitchen, our detailed instructions and practical advice will enable you to master this delicious dish. Now let’s explore the world of Southern comfort food and try this Jackson Vanilla Wafers Banana Pudding, which will tantalize your taste buds!

Ingredients Required

Let’s look at the main components you’ll need before we get into the specifics of our delicious Jackson Vanilla Wafers Banana Pudding recipe:

  • Six to eight ripe bananas: Pick ones that are beginning to show some spots for the ideal ratio of flavor to sweetness.
  • Two cups whole milk: To make a rich, creamy pudding.
  • One can (fourteen ounces) of condensed milk that has been sweetened: To give your pudding a little sweetness.
  • One box of Jackson Vanilla Wafers: For a true-to-life flavor, use these wafers.
  • To make homemade whipped cream, use two cups of heavy cream.
  • 1/4 cup of powdered sugar: For the topping of the whipped cream and additional sweetness.
  • Four large eggs: For the custardy texture of the pudding.
  • For a hit of authentic vanilla flavor, use two teaspoons of vanilla extract.

Step-by-step instruction

Let’s get started on the step-by-step instructions for making Jackson Vanilla Wafers Banana Pudding now that you have your ingredients ready.

1. Get the custard ready:

Mix one can of sweetened condensed milk and two cups of whole milk in a medium-sized saucepan.Heat the mixture in the saucepan over medium heat until it is steaming but not boiling. Stir from time to time to avoid burning.

jackson vanilla wafers banana pudding recipe
Jackson vanilla wafers banana pudding

2.Beat the Omelets:

In a separate bowl, whisk together 4 large eggs until well combined while the milk mixture is heating.To prevent curdling, slowly pour the heated milk mixture into the whisked eggs while whisking continuously.

3.Preheat the custard:

Refill the saucepan with the combined mixture and cook, stirring constantly, over low heat until the mixture thickens and coats the back of a spoon. This ought to take ten to fifteen minutes.After taking the custard off the stove, whisk in two teaspoons of vanilla extract. Allow to cool.

4.Beat the Yogurt:

Beat two cups heavy cream in a different bowl until soft peaks form.Whip in the 1/4 cup of granulated sugar gradually until stiff peaks form.

5.Put the Pudding Together:

Starting at the bottom of a serving dish or individual dessert cups, layer vanilla wafers.After slicing, arrange the ripe bananas on top of the wafers.Cover the bananas with half of the custard.Add another layer of wafers, bananas, and custard and repeat the process.Lastly, place the recently whipped cream on top of the pudding.

6. Cool and Present:

For optimal flavor, cover and refrigerate your Jackson Vanilla Wafers Banana Pudding for at least 4 hours, or overnight.Garnish with extra vanilla wafers and banana slices when ready to serve.

Why This Recipe Is Unique:

There are several important reasons why our Jackson Vanilla Wafers Banana Pudding recipe is unique. The dessert is elevated by the use of Jackson Vanilla Wafers, which have a unique and delectable flavor. Second, the harmony of flavors and textures produced by the marriage of fresh bananas, homemade custard, and sweet whipped cream is simply divine.

Variations and Advice:

 Although our recipe follows custom, you are welcome to add your own unique touch to this beloved Southern dish. To add more taste and texture, some variations include adding a sprinkle of crushed nuts or a drizzle of caramel sauce. In addition, you can make the custard from scratch or use an instant pudding mix if you’re pressed for time.

Food Worth:

A delicious Southern dessert with a blend of flavors, textures, and nutrients is Jackson Vanilla Wafers Banana Pudding. Let’s examine each of the main ingredients and the benefits and drawbacks they have in order to better understand its nutritional value:

The Banana

Advantages:

abundant in vital minerals and vitamins, especially potassium, vitamin C, and vitamin B6.Assist with satiety and digestive health by including dietary fiber.The pudding’s overall flavor is enhanced by its natural sweetness, which eliminates the need for excessive added sugar.

Drawbacks

Although nutrient-dense, bananas have a high calorie content, so if you’re watching your intake, it’s crucial to manage portion sizes.

Whole Milk: 

Benefits:

a healthy supply of calcium, which is necessary for strong teeth and bones.

supplies the vital proteins and fats required for good health.

adds to the pudding’s richness and creamy texture.

Drawbacks:

Rich in saturated fat, which can be harmful to heart health if ingested in excess.Not recommended for people who are intolerant to lactose.

Advantages of Sweetened Condensed Milk:

gives the pudding more sweetness and a thick, creamy texture.a practical addition to recipes calling for desserts.

Drawbacks

Rich in added sugars, which can cause dental and other health problems as well as weight gain.Offers minimal nutritional value beyond calories.

Vanilla Wafers: 

Advantages:

Sweet and crispy, giving the dessert a lovely texture.include modest amounts of carbohydrates and protein to provide a rapid energy boost.

Drawbacks

Like many cookies, vanilla wafers contain a lot of sugar and refined carbohydrates, which, when consumed in excess, can cause weight gain and blood sugar spikes.

Thick Cream:

Advantages:

gives the whipped cream topping a rich, velvety texture.provides a source of some vitamins and good fats.

Drawbacks

high in saturated fat, so limiting intake is essential to prevent negative heart health effects.incredibly high in calories, which, if consumed in excess, may cause weight gain.

Eggs: 

Benefits
 
Fantastic source of premium protein.
Packed with vital vitamins, minerals, and amino acids, including choline, vitamin B12, and vitamin D.
 
Drawbacks
 
Even though they are incredibly nutrient-dense, eggs can contain dietary cholesterol, which may be problematic for people who already have high cholesterol.

Grated Sugar: 

Advantages:
improves the whipped cream’s flavor and sweetness.offers a rapid energy source.
 
Drawbacks
Too much sugar intake has been connected to a number of health concerns, such as diabetes, obesity, and dental problems.
 

Extract from vanilla:

Advantages:
confers a unique and agreeable taste to the whipped cream and custard.
contains antioxidants that may be beneficial to health.
 
Drawbacks
Usually taken in small doses, so there aren’t many health advantages. 
 

All things considered, Jackson Vanilla Wafers Banana Pudding is unquestionably a rich and decadent dessert, but it should only be consumed occasionally. The tasty flavors, the use of fresh bananas, and the possible nutritional advantages of some ingredients are the dessert’s strong points. On the other hand, the main drawbacks are related to the high levels of sugar and saturated fat present in some of the ingredients, which may be harmful in excess. Like with any dessert, you should balance it with a nutritious, well-rounded diet and enjoy it occasionally to make sure your needs are met overall.Read more..

FAQ

Most frequent questions and answers

Can I use any type of banana for this recipe?

Ideally, ripe bananas with a few brown spots are best for sweetness and flavor. Overly ripe bananas may turn mushy, so aim for a balance.

What can I use as a substitute for whole milk?

You can use alternatives like low-fat milk or unsweetened almond milk, but keep in mind that it might affect the overall richness of the pudding.

How do I store leftover banana pudding?

Cover it and refrigerate for up to 2-3 days. However, for the best taste and texture, it’s recommended to consume it within the first day or two.

How long does this salad stay fresh?

Cover it and refrigerate for up to 2-3 days. However, for the best taste and texture, it’s recommended to consume it within the first day or two.

Can I make this pudding in advance for a party?

Yes, you can prepare it a day ahead and refrigerate it overnight. Just add the whipped cream and garnish before serving.

Is there a way to reduce the sugar content in the recipe?

You can reduce the sugar slightly in the custard and whipped cream, but remember it can affect the overall taste and texture.

Can I make this dessert without eggs?

Yes, there are eggless custard recipes available. You can also use store-bought eggless custard or pudding mix.

Are there any gluten-free alternatives to vanilla wafers?

Some brands offer gluten-free vanilla wafer cookies, which can be used as a substitute.

Can I make a smaller portion of this dessert?

Absolutely, you can adjust the ingredient quantities to make a smaller batch based on your needs.

How can I make the whipped cream more stable?

Adding a stabilizer like cornstarch or gelatin can help the whipped cream hold its shape longer.

Can I make this recipe with reduced-fat or sugar-free ingredients?

You can use low-fat or sugar-free versions of some ingredients, but be aware that it may affect the final taste and texture of the dessert.

Is there a way to reduce the sugar content in the recipe?

You can reduce the sugar slightly in the custard and whipped cream, but remember it can affect the overall taste and texture.

Filed Under: Recipes

Amazing Delicacy: Recipe for Bisquick Zucchini Quiche

2023/2/7 by veg_admin Leave a Comment

Recipe for bisquick zucchini quiche

Do you have an intense desire for something savory and delicious that’s also incredibly simple to make? You only need to look at our Bisquick Zucchini Quiche Recipe! This is a great way to use up those fresh zucchini from the garden and works well for breakfast, brunch, or even a light dinner. We’ll walk you through the steps of making a zucchini quiche with Bisquick, a flexible baking mix, in this blog post. You’ll find yourself coming back for more of this recipe, regardless of your experience in the kitchen—it’s so easy to prepare.

Ingredients Required:

Prior to delving into the detailed instructions, let’s examine the inventory of ingredients required to make Bisquick Zucchini Quiche:  

  • 1 1/2 cups Bisquick mix: The pièce de résistance, this mix gives the quiche its perfectly flaky crust.
  • 1. Half a cup of finely chopped zucchini, freshly grated for a crunchy, green taste.
  • A delicious depth of flavor is added with 1/2 cup chopped onion.
  • Half a cup of grated Parmesan cheese: for a flavorful, nutty finish.
  • Vegetable oil (1/2 cup): This keeps the quiche soft and moist.
  • Four large eggs serve as the cohesive element that keeps everything in place.
  • Use your favorite chopped fresh herbs, parsley, chives, or basil work great. Add 1/2 cup of chopped fresh herbs.
  • One-fourth teaspoon salt: To bring out the flavors.
  • For that, use 1/4 teaspoon of ground black pepper.
  • 1/4 tsp powdered garlic a light garlicky taste to lift the meal.
  • These basic ingredients combine to make a filling and healthy quiche. Let’s begin the detailed instructions now.

Step-by-step instruction:

1. Preheat your oven

Set the oven temperature to 350°F (175°C). This guarantees that your quiche bakes uniformly and acquires a stunning golden-brown hue.

2. Get the zucchini ready

Start by chopping up the zucchini. After shredding, put it in a fresh cheesecloth or kitchen towel and wring out any extra moisture. This is an important step to keep your quiche from getting too runny.

Recipe for bisquick zucchini quiche
Risquick zucchini quiche


3. Combine the Substances

Add the Bisquick mix, shredded zucchini, chopped onion, grated Parmesan cheese, eggs, vegetable oil, fresh herbs, salt, black pepper, and garlic powder to a large mixing bowl. Until all the ingredients are well combined, stir everything together.

4.Bake the quiche in step four

Pour the mixture into a 9-inch pie dish that has been greased next. Ensure that it is dispersed equally. After preheating the oven, place the pie dish inside and bake for about 35 to 40 minutes, or until the quiche is set and the top has a light golden color.

Bisquick Zucchini Quiche: A Masterwork of Cooking

More than just a dish, Bisquick Zucchini Quiche is a culinary masterwork that perfectly combines the distinct flavors of zucchini, herbs, and Parmesan cheese. It’s difficult to resist the delightful flakiness that the Bisquick crust adds. This dish is sure to please any crowd, whether it is served as an elegant appetizer at a gathering or as part of a family brunch.

Why You’ll Love It:

Adaptable: You can have it for dinner, brunch, or breakfast.

Time-saving: Almost ready in an hour.

Garden Fresh: An excellent method for utilizing extra zucchini.

Delectable: The taste combination is just too good.

Simple Cleanup: The kitchen is not overly messy.

Nutritional Value

The following is a summary of the approximate nutritional values for one serving of Bisquick Zucchini Quiche to assist you in making educated dietary decisions:
  • 220 calories
  • 15g of fat
  • 3.5g of saturated fat
  • Glycemic index: 105 mg
  • 360 mg of sodium
  • 15g of carbohydrates
  • 1g of fiber
  • 7g protein
 
Note: Brands of ingredients and serving size may have an impact on nutritional values.
 

Conclusion

Using Bisquick in your recipe for zucchini quiche not only saves time but gives the crust a delightful flaky texture. This easy-to-make yet sophisticated dish will wow your family and friends on any occasion. With the Bisquick Zucchini Quiche recipe in hand, it’s time to get in the kitchen and get cooking. Regardless of your level of culinary expertise, this recipe is an easy method to prepare a tasty and unforgettable supper. Good appetite!

Thus, keep this recipe in mind the next time you have an abundance of zucchini in your garden and treat yourself to a delicious Bisquick Zucchini Quiche that is sure to become a family favorite. Cheers to cooking!Read More

FAQ

Most frequent questions and answers

Is it possible to use different kinds of zucchini in this recipe?

To make a colorful quiche, you can use a variety of zucchini, such as yellow squash, pattypan, or even a combination of them.

Is it possible to prepare and reheat this quiche ahead of time?

Definitely! For a delicious and easy dinner, Bisquick Zucchini Quiche can be prepared in advance and warmed up in the oven or microwave.

Can I include additional vegetables in the quiche?

Obviously! Add bell peppers, mushrooms, spinach, or any other vegetables you like to personalize your quiche.

Can I include additional vegetables in the quiche?

Obviously! Add bell peppers, mushrooms, spinach, or any other vegetables you like to personalize your quiche.

Which herbs complement this recipe the best?

A taste explosion can be achieved with fresh herbs like basil, chives, or parsley. If you can’t find fresh herbs, you can use dried ones instead.

How should leftovers be stored?

Refrigerate any leftover quiche in an airtight container. Warm through in the microwave or oven for an easy, delicious dinner.

Is it possible to substitute another cheese for Parmesan?

Of course! For a different taste, try experimenting with cheeses like Swiss, mozzarella, or cheddar.

This recipe makes how many servings?

6 to 8 servings are usually produced from this recipe, depending on how it is sliced.

Can I freeze this quiche to use at a later time?

The Bisquick Zucchini Quiche can be frozen. To keep it fresh, make sure to tightly wrap it in foil and plastic.

Is it possible to prepare a vegan or vegetarian version of this quiche?

You can make a vegetarian version by leaving out the meat ingredients, and a vegan version by using vegan cheese and eggs.

Filed Under: Recipes Tagged With: Bisquick Zucchini Quiche

Texan Delight: Pioneer woman Texas trash recipe

2023/2/7 by veg_admin Leave a Comment

Pioneer woman Texas trash recipe

Are you looking for a delicious and simple-to-make Texan treat? The Pioneer Woman Texas Trash Recipe is the only place to look. For many years, this wonderful blend of salty and sweet flavors has been a fan favorite. We’ll delve into the tasty realm of the Pioneer Woman’s Texas Trash Recipe in this blog post, going over its preparation, history, and ingredients. A gourmet adventure that will leave your taste buds singing with every bite awaits you.

The Short History of the Pioneer Woman Texas Trash Recipe:

Prior to getting into the recipe, it’s critical to understand the background history of this mouthwatering Texan treat. Although the name “Texas Trash” may sound odd, it’s actually a playful and cheerful moniker for an excellent snack mix rather than a disparaging one. This recipe comes from the heart of Texas, where intrepid pioneers used common, easily accessible ingredients to create this delicious blend of flavors.

What Makes Texas Trash Tasty Ingredients:

You’ll need a few essential ingredients to make the Pioneer Woman’s Texas Trash Recipe at home:

  • Cereal: A foundation of cereal is necessary. Cereals made of crisp rice and corn make great combinations.
  • Pretzels: They give a savory element to the mixture with their salty crunch.
  • Nuts: A mix of nuts, such as cashews and peanuts, offers a filling, high-protein component.
  • M&Ms: The vibrantly colored chocolates coated in candy add a delightful and lively touch.
  • White chocolate chips: These chips give the mixture a rich, creamy texture.
  • Butter: To coat the mixture and bind all the ingredients together, melt some butter.
  • Seasonings: The mix’s distinctive Texan flavor comes from a combination of Worcestershire sauce, garlic powder, onion powder, and seasoned salt.

Making the Texas Trash Recipe: A Comprehensive Guide:

We’re going to make the Pioneer Woman’s Texas Trash Recipe now that you have your supplies prepared. Take these easy steps to achieve a delicious result:

1.Preheat and Prepare:

Turn the oven’s temperature up to 250°F (120°C). For easier cleanup, line a large baking sheet with parchment paper.

2.Mix the Base:

Put the cereal, pretzels, and nuts in a big mixing dish.

Pioneer woman Texas trash recipe


3.Melt Butter:

In a skillet over low heat, melt the butter and mix in the seasonings and Worcestershire sauce. Mix everything up thoroughly by stirring.

4.Coat and Bake: 

Drizzle the cereal, pretzels, and nuts with the butter and seasoning mixture. Till everything is equally covered, gently toss. Line the baking sheet with the mixture and spread it out.

5.Baking Time:

Drizzle the cereal, pretzels, and nuts with the butter and seasoning mixture. Till everything is equally covered, gently toss. Line the baking sheet with the mixture and spread it out.

6.Cool and Stir in the Sweets:

Take the mixture out of the oven and let it to cool. Add the white chocolate chips and M&Ms after that.

7. Have Fun: 

It’s time to dig into Your Pioneer Woman’s Texas Trash. Keep it on hand for a fast snack or serve it at your next get-together.

Changes and Replacements:

The Texas Trash Recipe’s adaptability is one of its great features. To accommodate your taste and dietary requirements, there are a number of delicious modifications and substitutes available. For a gluten-free variation, you may substitute dark chocolate chips for the white chocolate or use gluten-free cereal and pretzels. Make this recipe your own by using your imagination!

Texas Trash Recipe: An Appetizing Snack for Crowds:

The Pioneer Woman’s Texas Trash Recipe is a great option whether you’re throwing a party, going to a potluck, or just want a tasty snack. It blends the delightful sweetness of M&Ms and white chocolate with the gratifying crunch of cereal and pretzels. The combination of spices gives it a Texan touch that makes you want more.So keep this tried-and-true recipe in mind the next time you’re craving a snack with a Texas twist. The flavors of Texas Trash will take you to a place of comfort and delight whether you’re in the Lone Star State or halfway over the globe. Try it out, and you’ll quickly be adding this dish to your collection of culinary skills.

Conclusion

We’ve explored the fascinating world of the Pioneer Woman’s Texas Trash Recipe in this blog post. We investigated its historical origins and the key components that give it its allure. You now have all the information need to make this delicious Texan dessert, including a step-by-step preparation guide and ideas for variants.So grab your ingredients, heat up the oven, and get ready to on a culinary adventure that honors Texas’s essence. Not simply a snack, the Pioneer Woman’s Texas Trash Recipe is a flavorful, traditional taste of Texan living that you may savor whenever and wherever you choose. Cheers to cooking!

FAQ

Most frequent questions and answers

What is the Pioneer Woman's Texas Trash Recipe?

The Pioneer Woman’s Texas Trash Recipe is a delicious snack mix that combines sweet and savory elements, making it a popular Texan treat.

Why is it called "Texas Trash"?

The name “Texas Trash” is a playful and endearing term for this snack mix, showcasing its rustic Texan roots. It’s a fun way to describe its irresistible combination of ingredients.

What are the key ingredients in the Texas Trash Recipe?

The essential ingredients include cereal (crispy rice and corn cereals), pretzels, nuts (peanuts and cashews), M&Ms, white chocolate chips, butter, and a blend of seasonings.

How do I make the Pioneer Woman's Texas Trash at home?

To make this delightful snack, you’ll mix the base ingredients, coat them with a seasoned butter mixture, bake, and then add M&Ms and white chocolate chips. Detailed instructions can be found in our blog post.

Can I customize the recipe to my taste?

Absolutely! The Texas Trash Recipe is versatile, allowing you to make various substitutions and additions. For example, you can use dark chocolate chips instead of white chocolate or choose gluten-free ingredients for dietary preferences.

What occasions is Texas Trash ideal for?

Texas Trash is perfect for gatherings, parties, movie nights, or as a quick snack. It’s a crowd-pleaser that can be enjoyed on many occasions.

How should I store the Texas Trash mix?

Store your Texas Trash in an airtight container to keep it fresh. It can last for several days, although it’s so delicious that it’s unlikely to stay uneaten for long!

Is this recipe authentically Texan?

While the exact origin is unclear, this recipe embodies Texan flavors and traditions. It’s a testament to Texan ingenuity and the joy of sharing good food.

Can I find variations of the Texas Trash Recipe?

Yes, you can explore various interpretations and adaptations of the Texas Trash Recipe. Get creative and put your unique spin on this Texan classic.

Where can I find the full recipe and more details?

For the complete Pioneer Woman’s Texas Trash Recipe, along with detailed information and tips, refer to our blog post, “Deliciously Texan: Unveiling the Pioneer Woman’s Texas Trash Recipe.”

Filed Under: Recipes Tagged With: Texas trash recipe

Mastering the Better Homes and Gardens Waffle Recipe

2023/2/7 by veg_admin 1 Comment

better homes and gardens waffle recipe

Are you finding a Better Homes and Gardens waffle recipe to improve the way you eat breakfast? There’s no need to search any further as we explore the realm of the Better Homes and Gardens waffle recipe.Whether you’re an experienced foodie or an aspiring home cook, these delicious waffles will definitely whet your appetite. We’ll lead you through the process, offer professional advice, and divulge the secrets to turning these waffles into a treasured family favorite in this extensive guide. So take up your apron and join me as we take this classic Better Homes & Gardens waffle recipe on a culinary adventure.

The Background of the Waffle Recipe from Better Homes & Gardens

Let’s examine the background and importance of Better Homes and Gardens in the culinary arts before getting into the specifics of the dish.
 
Since its launch in 1922, the well-known lifestyle magazine Better Homes and Gardens has served as a reliable source of inspiration for do-it-yourselfers and foodies. The name has grown to be associated with delicious, easy-to-follow, and family-friendly recipes that have stood the test of time.
 
Among its many culinary gems, the Better Homes and Gardens waffle recipe has endured over time because of its ease of preparation and delicious outcome. Now let’s discover the techniques that have made this waffle recipe a mainstay in many homes.
 

How to Prepare the Better Homes and Gardens Waffle Recipe’s Ingredients

Make sure you have all the ingredients on hand before you begin cooking. Like any good dish, the Better Homes and Gardens waffle recipe is only as good as the ingredients it uses. What you’ll need is as follows:

Two cups of flour, all-purpose

  • Two tablespoons of sweetener
  • One-third cup of baking powder
  • Two whipped eggs
  • A half-cup of milk
  • One-half cup vegetable oil
  • A single tsp of vanilla extract
  • We can now proceed to the next important steps in this recipe now that we have the components ready.
Instructions for Making Better Homes and Gardens Waffles, Step-by-Step:


1.Preheat Your Waffle Iron:

Before cooking, make sure your waffle iron is heated to the proper temperature. This will assist in giving your waffles the ideal crispness of golden brown.

2.Mix the Dry Ingredients:
Put the sugar, baking powder, and all-purpose flour into a sizable mixing basin. While the baking powder will make your waffles light and fluffy, the sugar offers a sense of sweetness.

better homes and gardens waffle recipe


3. Whisk the Wet Ingredients:
Stirring until just blended, gradually pour the wet ingredients into the dry ingredients. Remember not to overmix—a few lumps are acceptable.

When it’s time to cook, transfer the batter to the center of the heated waffle iron after it’s ready. Follow the manufacturer’s directions for cooking and shut off the lid. Waffles with a crisp,golden brown exterior and a soft, tasty interior should be the finished product.

4. Here’s the fun part:

Serve with your favorite toppings! Present your recently prepared waffles with a variety of garnishes. You can choose to top it with whipped cream, fresh berries, classic maple syrup, or a dusting of powdered sugar.

Why Opt for the Waffle Recipe from Better Homes & Gardens?

There’s a reason why the Better Homes and Gardens waffle recipe is a classic. It blends flavor and simplicity, making it ideal for both novice and seasoned cooks. Here are some strong arguments for trying it out:

Time-Tested Quality:

After almost a century of praise, you can rely on this recipe to provide consistently wonderful results every time.

Versatile:

Feel free to express your imagination with these waffles. Try a variety of toppings, such as fresh fruit, nuts, or even savory items like cheese and spices.

Family Favorite:

This dish is sure to please everyone and is ideal for get-togethers for brunch or breakfast with loved ones.

Simple to Modify: 

You may easily change the basic recipe to suit your nutritional needs by using dairy-free milk or whole wheat flour, for example.

Quick and Convenient: 

These waffles are a great option for hectic mornings because you can quickly prepare a batch of them.

Conclusion

Finally, A tried-and-true classic, the Better Homes and Gardens waffle recipe is worth adding to your culinary repertoire. These waffles will not let you down, whether you’re preparing breakfast for your family, throwing a brunch, or you’re just in the mood for something sweet.To know more Click here.

Filed Under: Recipes Tagged With: waffle recipe

Spice Up Your Meals: Delicious Recipes with Pepper Jack Cheese

2023/2/7 by veg_admin 6 Comments

This is the perfect spot to look for delicious recipes with pepper jack cheese. A versatile ingredient that may enhance a variety of recipes is pepper jack cheese, which has a creamy texture and a dash of spiciness. We have everything you need, whether you’re throwing a party, making a quick weekday supper, or just asking to indulge your cheese desires. Come along on a tasty adventure as we investigate the mouthwatering possibilities of dishes including pepper jack cheese.

Why Pepper Jack Cheese?

You may be wondering what makes pepper jack cheese unique before we go on this culinary excursion. It’s a delicious combination of Monterey Jack cheese with jalapeño peppers, giving rise to a creamy yet mildly spicy cheese. This unusual combination gives any meal a zesty edge, which makes it a great option for anyone who like a little spice in their cuisine. A vast array of meals can benefit from the strong flavors and melting perfection of pepper jack cheese. Let’s now look at some delicious recipes that feature pepper jack cheese prominently.

1. Pepper Jack Cheese-Stuffed Jalapenos

Spice Level: Medium
 
We begin our culinary exploration of pepper jack cheese with a traditional and delicious appetizer. These jalapenos filled with pepper jack cheese are the ideal balance of spicy and creamy, guaranteed to wow your guests at any party. You just need a few basic components, and the preparation is really easy.

  Ingredients:
  • Ten raw jalapenos
  • One cup of pepper jack cheese, shredded
  • 50 ml of cream cheese
  • 1/4 cup of freshly chopped cilantro
  • 1/4 cup red onion, chopped
  • One-half tsp of garlic powder
  • Add pepper and salt to taste.

2. Pepper Jack Mac and Cheese

Spice Level: Mild
 
A popular comfort food, mac and cheese is elevated to a whole new level when pepper jack cheese is added. This recipe is great for both adults and children alike because it is creamy, cheesy, and slightly spicy.
 
Ingredients:
  • elbow macaroni, 8 ounces
  • Two cups of finely grated sharp cheddar cheese
  • One cup of pepper jack cheese, shredded
  • Two cups milk
  • 1/4 cup butter without salt
  • 1/4 cup flour for all purposes
  • One-half tsp paprika
  • Add pepper and salt to taste.
 

3. Quesadillas with pepper jack cheese 

Spice Level: Hot

Try cooking some quesadillas with pepper jack cheese for a simple yet filling lunch. These are ideal for hectic weeknights when you’re in a hurry and want something tasty. The pepper jack cheese’s spiciness perfectly balances the other flavors.

Ingredients:

  • 4 big flour tortillas.
  • Two cups of pepper jack cheese, shredded
  • One cup of cooked meat or chicken (optional)
  • Diced bell peppers, 1/2 cup
  • 1/4 cup red onion, chopped
  • A single tsp of chili powder
  • One-half tsp cumin
  • Add pepper and salt to taste.

4. A sandwich with grilled pepper jack cheese:

Spice Level: Medium

Try A grilled cheese sandwich is a traditional favorite that takes on remarkable quality when made with pepper jack cheese. This recipe will definitely satisfy your hunger for a warm, cheesy treat and is ideal for a quick lunch or light meal.

Ingredients:

  • 4 pieces of your preferred bread
  • Two cups of pepper jack cheese, shredded
  • two tsp of butter
  • 1/4 cup of pickled jalapeños, sliced
  • One-third cup mayonnaise
  • One-half tsp of garlic powder
  • Add pepper and salt to taste.

5. Cheese-Stuffed Pepper Jack Burgers

Spice Level: Hot

Are you prepared to step up your burger-eating game? The explosion of flavor in these pepper jack cheese-stuffed burgers will make your taste buds tingle. These are ideal for a nice weekend dinner or a summertime BBQ. Are you prepared to step up your burger-eating game? The explosion of flavor in these pepper jack cheese-stuffed burgers will make your taste buds tingle. These are ideal for a nice weekend dinner or a summertime BBQ.

Ingredients:

  • 1.5 pounds of beef ground up
  • 4 pepper jack cheese slices
  • 1/4 cup red onion, chopped
  • Diced pickled jalapeños, 1/4 cup
  • A single tsp of chili powder
  • Add pepper and salt to taste.
  • hamburger buns with the toppings of your choice.

Recall that the caliber of your pepper jack cheese is essential to successfully completing these recipes. To get the greatest effects, use a high-end variety. Cheers to many culinary explorations using pepper jack cheese!

recipes with pepper Jack cheese
Recipes with pepper Jack cheese

Conclusion :

The hidden ingredient that may take your recipes from ordinary to spectacular is pepper jack cheese. It also adds a delicious touch of spice and creamy texture to a wide range of recipes. Besides There are several options available, ranging from starters through main courses and even snacks as well. There is a pepper jack cheese recipe for every taste, regardless of how spicy or mild you like your cheese. Thus, try one of these pepper jack cheese recipes the next time you’re definitely craving some cheesy pleasure with a kick. Your palate will appreciate the enjoyable experience.

Also add some pepper jack cheese to your recipes now and enjoy the kick of spice it adds to your favorite foods.

Filed Under: Recipes Tagged With: Pepper Jack Cheese

Delight Your Taste Buds with BJ’s Avocado Egg Rolls Recipe

2023/2/7 by veg_admin 7 Comments

BJ’s avocado egg rolls recipe

If you’re looking for the ideal appetizer to tempt your taste buds, go no farther than “BJ’s Avocado Egg Rolls Recipe.” Avocado lovers and foodies alike should try these scrumptious delicacies from BJ’s Restaurant & Brewhouse. In this post, we’ll walk you through the step-by-step process of preparing these avocado egg rolls and show you why they’re so popular. Let’s dive into the art of making these tempting rolls that are excellent for any occasion!

The Ultimate Avocado Egg Rolls Recipe

Ingredients Required

You’ll need the following materials to reproduce the enchantment of BJ’s Avocado Egg Rolls in your own kitchen:

  • 2 avocados, ripe
  • Sun-dried tomatoes, 1 cup
  • 1/4 cup fresh cilantro 1 cup red onion
  • 1 tbsp. fresh lime juice
  • a half teaspoon cumin
  • 1/4 teaspoon black pepper 1/2 teaspoon salt
  • 1 box egg roll wrappers (around 12)
  • For frying, use oil.

Step-by-step instructions:

1. Preparation and construction

To begin, cut the ripe avocados into little cubes. They should be ripe but not overripe. Next, carefully cut the sun-dried tomatoes, red onion, and fresh cilantro. These ingredients’ brilliant colors and flavors will make your avocado egg rolls stand out.

2. Seasoning

Combine the chopped avocados, sun-dried tomatoes, red onion, and fresh cilantro in a mixing dish. For a zesty boost, add a tablespoon of fresh lime juice. Season the mixture with cumin, salt, and black pepper to taste. Toss everything together gently, making sure all of the ingredients are fully combined.

BJ’s avocado egg rolls recipe


3. Rolling the Rolls

Make a diamond form with an egg roll wrapper, one corner pointing toward you. Place a large dollop of the avocado mixture in the center of the wrapper. Be careful not to overfill, as this can make rolling difficult.

4. Sealing and rolling

Fold the corner pointing toward you over the avocado filling to roll the egg roll. Then, fold in the left and right corners to form an envelope. Moisten the top corner with a little water and roll the egg roll until it is sealed. Check that the seal is tight to prevent any filling from leaking during the frying process.

Perfection in Frying

Heat the oil in a deep skillet or fryer to 350°F (175°C). Place the egg rolls, one at a time, into the hot oil and cook until golden brown, about 2-3 minutes per side. Remove them from the oil with a slotted spoon and lay them on a paper towel-lined plate to absorb any leftover oil.

Serving and Having Fun

BJ’s Avocado Egg Rolls are best served hot and fresh. Serve with your preferred dipping sauce, such as sweet chili sauce, ranch dressing, or a zesty cilantro-lime dip. The crunchy, golden-brown shell and the creamy, savory interior will tempt your taste buds.

Why Should You Make BJ’s Avocado Egg Rolls?

Irresistible Creaminess and Crunchiness
A creamy and savory filling of ripe avocados, sun-dried tomatoes, and fresh cilantro balances the crispy egg roll wrapper nicely. Each bite is a delicious juxtaposition of textures and flavors.
Easy to Make
Despite their restaurant-quality appearance, these avocado egg rolls are surprisingly simple to make at home. You’ll blow your guests away with your culinary abilities without breaking a sweat.
Versatile Appetizer
Whether you’re throwing a party or just looking for a fast snack, these avocado egg rolls are perfect. They are adjustable and versatile, making them an excellent choice for any event.
Healthy Avocado Goodness
Avocados are well-known for their health benefits, as they are high in heart-healthy fats and important elements. This dish allows you to experience the health benefits of avocados in a fun and tasty way.
Restaurant-Quality Flavor
BJ’s Restaurant and Brewhouse is well-known for its delectable avocado egg rolls. You can get the same restaurant-quality flavor at home by following this recipe.
Conclusion

Furthermore, whether you want to wow your friends or simply enjoy a delightful snack, the BJ’s Avocado Egg Rolls Recipe is an excellent choice. The delectable blend of creamy, tangy filling encased in a flawlessly crispy wrapper is simply extraordinary. You can reproduce the enchantment of BJ’s Restaurant and Brewhouse in the comfort of your own kitchen by following a few simple steps and using readily available materials. Don’t miss out on this once-in-a-lifetime opportunity; disappointment is not on the menu. Today, go on a culinary adventure and enjoy the delectable and contrasting textures of BJ’s Avocado Egg Rolls!

For more delicious recipes and cooking tips, stay tuned to vegetable-recipes.net

FAQ

Most frequent questions and answers

Is the recipe for BJ's Avocado Egg Rolls the same as the restaurant version?

While the recipe we present closely resembles the flavors and textures of BJ’s Restaurant and Brewhouse’s Avocado Egg Rolls, there may be some flavor differences owing to the home cooking environment.

What are the best dipping sauces for Avocado Egg Rolls?

Avocado Egg Rolls complement a range of dipping sauces, such as sweet chili sauce, ranch dressing, and cilantro-lime dip. Sauces can be adjusted to your specific preferences.

Can I make Avocado Egg Rolls in advance and reheat them?

https://vegetable-recipes.net/vegetarian-and-vegan-vegetable-recipes/It’s best to enjoy Avocado Egg Rolls fresh, right after frying, to preserve their crispy texture and creamy filling. Reheating can affect their quality.

What is the secret to getting a flawlessly crispy wrapper?

To get a crispy wrapper, heat your oil to the proper temperature (about 350°F or 175°C) before frying the egg rolls. Also, before frying, make sure to properly seal them.

Can I top this salad with more vegetables?

Certainly! To increase the freshness of the salad, feel free to add your preferred veggies, such as cucumbers, bell peppers, or cherry tomatoes.

Can I create vegetarian or vegan Avocado Egg Rolls?

Absolutely! You may make vegetarian or vegan Avocado Egg Rolls by using egg-free wrappers and replacing dairy-based ingredients with acceptable plant-based substitutes.

Can I top this salad with more vegetables?

Certainly! To increase the freshness of the salad, feel free to add your preferred veggies, such as cucumbers, bell peppers, or cherry tomatoes.

Can I top this salad with more vegetables?

Certainly! To increase the freshness of the salad, feel free to add your preferred veggies, such as cucumbers, bell peppers, or cherry tomatoes.

Explore a world of culinary delights on vegetable-recipes.net! Whether you’re seeking savory sides, hearty mains, or innovative vegetable-based dishes, our homepage is your gateway to a treasure trove of flavorful recipes. Visit to discover the latest additions and elevate your vegetable-centric culinary journey!

For all sorts of boots and shoes visit Firesfeet!

Filed Under: Recipes Tagged With: BJ's avocado egg rolls

Unveiling the Secrets of Little Caesar’s Pizza Sauce Recipe

2023/2/7 by veg_admin Leave a Comment

little Caesar's pizza sauce recipe

When it comes to delicious pizza, the sauce is the unsung hero that holds everything together. Today, we’re going to expose the prized Little Caesar’s pizza sauce recipe, a closely guarded secret that has helped this pizza restaurant become a favorite among pizza fans all over the world. You’re in for a treat if you’ve ever wondered what makes their sauce so wonderful.

The Quest for Perfect Pizza Sauce

Pizza enthusiasts know that the sauce is the heart and soul of any great pizza. It’s the foundation upon which the entire culinary masterpiece is built. Little Caesar’s, a renowned pizzeria with a history dating back to 1959, has consistently wowed its customers with a sauce that strikes the perfect balance of flavors.


The Ingredients You’ll Need

You’ll need the following ingredients to make your own Little Caesar’s pizza sauce at home:
  • 1 can (6 ounces) of tomato paste
  • 1/4 cup of water
  • 1/2 teaspoon of sugar
  • 1/4 teaspoon of dried oregano
  • 1/4 teaspoon of dried basil
  • 1/4 teaspoon of salt
  • 1/4 teaspoon of garlic powder
  • 1/4 teaspoon of onion powder

Instructions:


1. Gather your Ingredients

Make sure you have all of the materials before you begin. To obtain the trademark Little Caesar’s flavor, use high-quality tomato paste.

2: Combine the Ingredients
Combine the tomato paste and water in a mixing dish. Stir the ingredients until it is smooth and well-blended.
 
3. Combine the Seasonings
It’s now time to blend those individual flavors into your sauce. To the tomato paste mixture, add the sugar, dried oregano, dry basil, salt, garlic powder, and onion powder.
 
 
little Caesar's pizza sauce recipe
Little Caesar's Pizza Sauce

4. Combine Thoroughly
Mix the ingredients well with a whisk or a spoon. Ensure that all of the seasonings are dispersed equally and that the sauce has a consistent texture.
 
5. Allow it to rest
Cover your sauce and place it in the refrigerator for at least an hour for the best effects. This allows the flavors to blend and create the classic Little Caesar’s flavor.

Why Make Little Caesar’s Pizza Sauce at Home?

“Why bother making pizza sauce from scratch when I can buy it?” you may ask. There are various causes for this:
 
  • Taste: Fresher and tastier homemade sauce is usually preferable to store-bought alternatives.
  • Making your own sauce allows you to customize the flavors to your desire. You can make it spicy or mild as you choose.
  • Satisfaction: There’s nothing like making your own pizza sauce to rival your favorite pizzeria’s.

Suggestions and Variations

  • Add a pinch of red pepper flakes for heat if you like your sauce with a kick.
  • Consider using fresh basil and oregano instead of dry for an extra depth of flavor.
  • Storage: Refrigerate any leftover sauce in an airtight jar for up to a week.

Finally, We’ve discovered the secret to Little Caesar’s pizza sauce in this article. You can duplicate that distinct flavor in your own kitchen by following our simple method. This homemade sauce will take your pizza game to a whole new level, whether you’re hosting a pizza night with friends or simply gratifying a need.

So, the next time you crave a classic Little Caesar’s pizza, skip the delivery and prepare it yourself. Your taste buds will be grateful!


For more delicious recipes and cooking tips, stay tuned to vegetable-recipes.net

FAQ

Most frequent questions and answers

What makes Little Caesar's pizza sauce so special?

Little Caesar’s pizza sauce is famed for its well-balanced flavors, and our formula allows you to replicate that flavor at home.

Can I use fresh tomatoes instead of tomato paste?

While tomato paste is advised for authenticity, fresh tomatoes can be used, but the flavor may differ.

Can I change the seasonings to my liking?

Absolutely! Our recipe serves as a starting point. Feel free to change up the seasonings to your liking.

How long can I keep homemade pizza sauce in the fridge?

You may keep it in the refrigerator for up to a week in an airtight container.
Is this dish appropriate for vegetarians?

Is this recipe suitable for vegetarians?

Yes, it is suitable for vegetarians. Check the labels of your items, though, to verify they are compatible with your nutritional needs.

Can I use fresh herbs instead of dried ones?

Certainly! Fresh basil and oregano can give your sauce a delicious, aromatic twist.

What's the secret to achieving that classic Little Caesar's flavor?

The trick is in the seasoning combination and balance, as well as allowing the sauce to sit to allow the flavors to mingle.

Filed Under: Recipes Tagged With: Little Caesar's Pizza Sauce

The Ultimate Pizza Hut Taco Pizza Recipe: A Mouthwatering Delight

2023/2/7 by veg_admin Leave a Comment

pizza hut taco pizza recipe

If you like pizza and tacos, you’re in for a treat today. We’re about to share the secrets to making the ultimate Pizza Hut Taco Pizza in the comfort of your own home. This delectable flavor mash-up will have your taste buds dancing with delight. Prepare to embark on a gastronomic voyage as we walk you through each step of this scrumptious journey.

The History of Taco Pizza

Before we go into the recipe, let’s remember where Taco Pizza came from. This delectable creation initially appeared on the menu of Pizza Hut, a well-known pizzeria, in the 1970s. Because of its unique blend of two beloved dishes: pizza and tacos, it soon became a crowd favorite.

Ingredients Required

Gather the following items to begin your Taco Pizza adventure: For the Pizza Dough:

  • 1 ½ cups of warm water
  • 2 tablespoons of sugar
  • 1 packet of active dry yeast
  • 4 cups of all-purpose flour
  • 1 teaspoon of salt
  • 2 tablespoons of olive oil

Toppings for Tacos:

  • 1 pound beef ground
  • 1 taco seasoning mix packet
  • 12 cup water
  • 1 tin refried beans
  • 2 cups cheddar cheese, shredded

For the garnish:

  • lettuce, sliced
  • Toasted tomatoes, diced
  • black olives, sliced
  • The sour cream
  • Jalapeno slices (optional)

Let’s get cooking:

1. Preparing the Pizza dough

  • Combine warm water, sugar, and yeast in a mixing dish. Allow it to sit for 5 minutes, or until it gets frothy.
  • Combine the yeast mixture with the flour, salt, and olive oil. Mix everything together until a soft dough forms.
  • Knead the dough for 5 to 7 minutes, or until smooth and elastic. Place it in a greased basin, cover using a clean cloth, and set aside for 30 minutes to rise.

pizza hut taco pizza recipe
Pizza hut Taco Pizza

2. Taco meat preparation

  • Cook the ground beef in a skillet over medium heat until it is no longer pink. Remove any excess grease.
  • Combine the taco seasoning mix and water in a mixing bowl. Simmer the mixture for 5 minutes, or until it thickens.

3. Assembling the Taco Pizza

  • Step 3: Putting Together the Taco Pizza
  • Preheat the oven to 475 degrees Fahrenheit (245 degrees Celsius).
  • Place the pizza dough in a 14-inch circle on a pizza stone or baking sheet.
  • Distribute the refried beans equally across the pizza dough.
  • Serve with cooked taco meat and grated cheddar cheese on top.
  • Bake for 12-15 minutes, or until the crust is golden brown and the cheese is bubbling, in a preheated oven.

4. Decorate Your Taco Pizza

  • After baking, top your Taco Pizza with chopped lettuce, diced tomatoes, sliced black olives, and a dollop of sour cream. Add some sliced jalapenos if you prefer it spicy.

5. Slice and Enjoy!

  • Serve your Taco Pizza in wedges and relish every bite of this gastronomic masterpiece.

Why Make Homemade Taco Pizza?

There are various advantages to making a Pizza Hut Taco Pizza at home. First and foremost, you have complete control over the ingredients, ensuring that they are both fresh and of good quality. Second, it’s a fun and creative way for family and friends to spend time in the kitchen together. Finally, it’s a less expensive option than getting takeout.

Variations and Customizations

Feel free to experiment with your Taco Pizza. To make it your own, add your favorite toppings like onions, bell peppers, or even pineapple for a unique touch. You can also use ground chicken or turkey instead of beef for a leaner option.

Conclusion

Finally, In this blog post, we’ve revealed the key to cooking a delectable Pizza Hut Taco Pizza at home. We’ve covered everything from making the ideal pizza dough to creating a delectable taco topping. When you’re craving a combination of pizza and tacos, don’t hesitate to make this delectable meal. Your taste buds will be grateful for this unique culinary adventure.

So, what are you holding out for? Gather your supplies and begin making your own Pizza Hut Taco Pizza right away! It’s a flavor experience you won’t want to miss.

For more delicious recipes and cooking tips, stay tuned to vegetable-recipes.net

FAQ

Most frequent questions and answers

What is Taco Pizza?

Taco Pizza is a delectable mix of pizza and tacos that brings the best of both worlds together in a single dish.

How long does it take to make Taco Pizza?

The dough and taco meat take around 30 minutes to make, and the pizza takes another 15 minutes to bake.

Can I customize Taco Pizza with my favorite toppings?

You certainly can! To make your own Taco Pizza, feel free to add your favorite toppings, such as onions, peppers, or pineapple.
Is Taco Pizza hot?

Is Taco Pizza spicy?

You may make it as spicy as you want. To suit your taste, add jalapenos or adjust the quantity of spiciness in the taco seasoning.

Why make Taco Pizza at home instead of ordering takeout?

You can use fresh ingredients, control the quality, and have a great culinary experience with friends and family when you make Taco Pizza at home.

Filed Under: Recipes Tagged With: Pizza Hut Taco Pizza

  • « Go to Previous Page
  • Go to page 1
  • Go to page 2
  • Go to page 3
  • Go to page 4
  • Go to page 5
  • Go to Next Page »

Primary Sidebar

zippy's macaroni salad recipe hawaii

Hawaiian chopped steak recipe

Craving a taste of the Hawaiian islands? Look no further than Zippy's Macaroni Salad Recipe, a culinary delight that … [Read More...] about Hawaiian chopped steak recipe

1950s recipe for tamale pie

1950s Tamale Pie: A Taste of Vintage Comfort Food

Is your kitchen lacking a touch of comfort and nostalgia? You've found it! This blog post will take you on a lovely … [Read More...] about 1950s Tamale Pie: A Taste of Vintage Comfort Food

রোধ, জল, বৃষ্টি

রোধ, জল, বৃষ্টি। ৬ষ্ঠ শ্রেনী। বিজ্ঞান-অনুশীলন বই

আমরা ষষ্ঠ শ্রেনীর বিজ্ঞান-অনুশীলন বইয়ের ৪র্থ অধ্যায়ে আলোচিত "রোধ, জল, বৃষ্টি"-শিখন অভিজ্ঞতার মধ্য দিয়ে বিভিন্ন ধরনের … [Read More...] about রোধ, জল, বৃষ্টি। ৬ষ্ঠ শ্রেনী। বিজ্ঞান-অনুশীলন বই

গতির খেলা-৬ষ্ট শ্রেণী

গতির খেলা। ৬ষ্ঠ শ্রেনী। বিজ্ঞান-অনুশীলন বই

এই পোস্টে আমরা জানবো ষষ্ঠ শ্রেনীর বিজ্ঞান বিষয়ের ৩য় শিখন অভিজ্ঞতা গতির খেলা  সম্পর্কে। প্রথম, দ্বিতীয় ও … [Read More...] about গতির খেলা। ৬ষ্ঠ শ্রেনী। বিজ্ঞান-অনুশীলন বই

ক্ষুদে বাগানঃটেরারিয়াম।সপ্তম শ্রেণী| বিজ্ঞান- অনুশীলন বই

এই পোস্টে আমরা সপ্তম শ্রেনীর বিজ্ঞান অনুশীলন বইয়ের ৭ম অধ্যায়,ক্ষুদে বাগানঃটেরারিয়াম  সম্পর্কে জানবো। প্রথম ও … [Read More...] about ক্ষুদে বাগানঃটেরারিয়াম।সপ্তম শ্রেণী| বিজ্ঞান- অনুশীলন বই

হরেক রকম খেলনার মেলা

হরেক রকম খেলনার মেলা।সপ্তম শ্রেণী| বিজ্ঞান- অনুশীলন বই

এই পোস্টে আমরা সপ্তম শ্রেনীর বিজ্ঞান অনুশীলন বইয়ের ৬ষ্ঠ অধ্যায়,হরেক রকম খেলনার মেলা  সম্পর্কে জানবো।প্রথম ও দ্বিতীয় … [Read More...] about হরেক রকম খেলনার মেলা।সপ্তম শ্রেণী| বিজ্ঞান- অনুশীলন বই

Footer

  • About Us
  • Affiliate Disclosure
  • Privacy Policy
  • Terms of Use
  • Contact Us

Copyright © 2025 · News Pro on Genesis Framework · WordPress · Log in